Archive: October 14, 2024

PDF

cessna 172n poh pdf

The Cessna 172N Pilot’s Operating Handbook (POH) is a comprehensive guide for operating the aircraft safely and efficiently. It provides detailed information on performance, safety, and maintenance procedures.

Overview of the Cessna 172N Aircraft

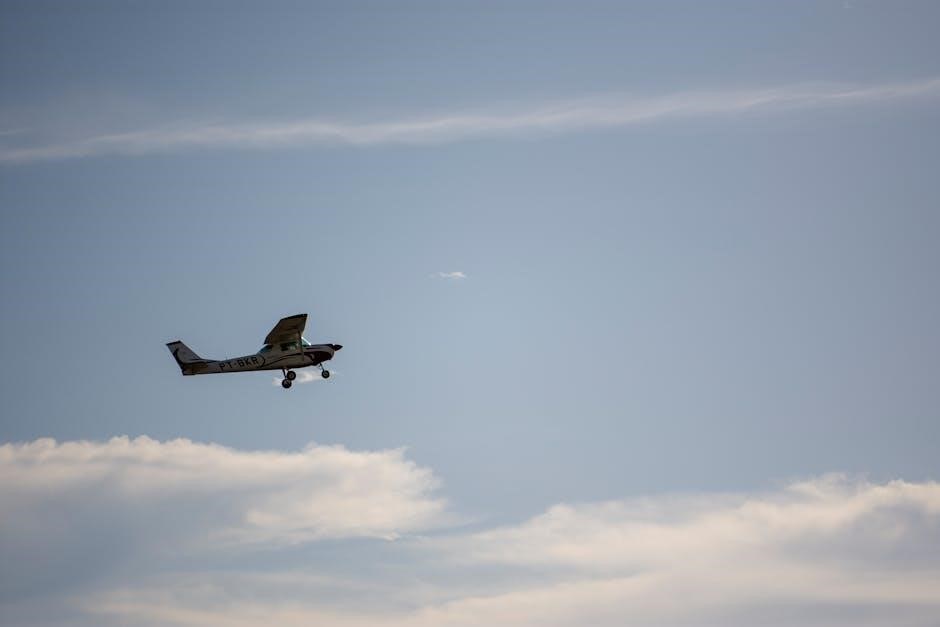
The Cessna 172N Skyhawk is a widely used, single-engine, four-seat aircraft known for its reliability and performance. Produced in 1978, it features a 180-horsepower Lycoming O-360 engine, making it suitable for both flight training and personal use. The aircraft is equipped with a fixed tricycle landing gear and operates on 100LL aviation fuel. Its design emphasizes stability and ease of handling, making it a favorite among pilots. The POH provides detailed operational guidelines, ensuring safe and efficient flight operations for pilots of all experience levels.

Importance of the POH for Pilots

Importance of the POH for Pilots

The Cessna 172N POH is a crucial resource for pilots, providing essential information on aircraft performance, safety, and maintenance. It serves as a comprehensive guide to maximize the airplane’s utility and ensure safe operations. Pilots rely on the POH for detailed procedures, limitations, and specifications, making it indispensable for both flight training and personal flying. Adhering to the guidelines in the POH ensures compliance with aviation standards and optimizes the aircraft’s performance, making it a vital tool for every pilot operating the Cessna 172N.

Normal Operating Procedures

Normal procedures include pre-flight checks, engine start, taxi, takeoff, cruise, landing, and shutdown. These steps ensure safe and efficient aircraft operation under various conditions.

Pre-Flight Checks and Inspections

Pre-flight checks are crucial for ensuring aircraft safety. They include inspecting the exterior for damage, verifying control surfaces, checking tire pressure, and ensuring proper function of lights and instruments. The pilot must also review the aircraft’s logbooks and ensure all required documentation is onboard. Additionally, fuel quantity and oil levels should be checked, and the propeller and engine compartment inspected for any signs of wear or damage. Proper pre-flight preparation helps identify potential issues before takeoff, ensuring a safe and successful flight.

Engine Start and Taxi Procedures

Engine start begins with priming, followed by advancing the throttle slightly. Ensure the mixture is set to idle cutoff. After starting, perform a mag check and lean the mixture for maximum RPM. Taxi with caution, using taxi lights in low visibility. Avoid sudden brake application to maintain directional control. Keep the nosewheel straight and use clear communication via radio; Always taxi at a safe speed, staying alert for obstacles and other traffic. Proper taxi techniques ensure safe ground operations and prevent potential damage to the aircraft.

Takeoff and Climb Procedures

Takeoff begins with advancing the throttle smoothly to full power while maintaining centerline alignment. Rotate at 55-60 KIAS for a normal takeoff. After liftoff, retract the flaps and adjust pitch for best climb speed, typically 70-80 KIAS. Climb at full power, monitoring oil pressure and temperature. Lean the mixture as altitude increases to maintain engine efficiency. Turn to crosswind or upwind as needed. Ensure all checklists are followed, and maintain situational awareness throughout the climb phase. Proper techniques ensure a safe and efficient departure.

Limitations of the Cessna 172N

The Cessna 172N has specific airspeed, weight, and altitude restrictions. Maximum gross weight is 2,300 lbs, and altitude limitations vary with load. Adherence is critical for safety.

Airspeed Limitations

Airspeed limitations are critical for safe operation of the Cessna 172N. The maximum allowable airspeed is 160 knots (IAS). Maneuvering speed (Va) is 140 knots, reducing to 100 knots above 10,000 feet. Stall speed varies with weight and configuration, typically around 55-60 knots. Exceeding these limits can cause structural damage or loss of control. Pilots must adhere to these speeds during all phases of flight, including takeoff, climb, cruise, and landing. Proper airspeed management ensures safety and optimal aircraft performance.

Weight and Balance Constraints

The Cessna 172N has a maximum gross weight of 2,550 pounds. Proper weight distribution is essential, with the center of gravity (CG) within specified limits. Overloading risks performance degradation and safety. Always ensure total weight remains below the maximum allowable. The POH provides detailed weight and balance calculations to prevent exceeding limits. Adhering to these constraints ensures optimal aircraft performance and safety during all flight phases.

Altitude Limitations

The Cessna 172N has a service ceiling of 13,500 feet, the maximum altitude it can reach under standard conditions. Pilots must avoid exceeding this limit to maintain performance and safety. High-altitude operations require careful planning, including oxygen use for crew and passengers above 12,500 feet. The POH specifies altitude restrictions to prevent engine and airframe stress. Always consult the manual for precise altitude limits based on weight, temperature, and other factors to ensure safe and efficient flight operations.

Performance Specifications

The Cessna 172N delivers a maximum speed of 168 knots at sea level, a climb rate of 720 ft/min, and excellent fuel efficiency during cruise, making it a reliable aircraft with a service ceiling of 13,500 feet.

Maximum Speed at Sea Level

The Cessna 172N achieves a maximum speed of 168 knots at sea level under optimal conditions. This performance is influenced by engine power, propeller efficiency, and aircraft configuration. Pilots should reference the POH for precise speed limitations and operational guidelines to ensure safe and efficient flight operations. Adhering to these specifications is crucial for maintaining engine longevity and overall aircraft performance.

Cruise Performance and Fuel Efficiency

The Cessna 172N delivers a cruise speed of approximately 140 knots at 8,000 feet, balancing performance and fuel efficiency. Optimal fuel consumption is achieved by maintaining recommended power settings and leaning the mixture. Pilots should reference the POH for specific altitude and power combinations to maximize efficiency. Proper pitch and RPM adjustments are crucial for consistent performance. Following these guidelines ensures economical operation while maintaining safety and effectiveness during flight.

Climb Rate and Service Ceiling

The Cessna 172N achieves a maximum climb rate of approximately 770 feet per minute at sea level. Its service ceiling is 13,100 feet, allowing operation in various atmospheric conditions. Climbing at the recommended airspeed ensures optimal performance. Pilots should adjust pitch and power settings as outlined in the POH to maintain efficiency. The aircraft’s climb performance is influenced by weight, altitude, and temperature. Proper planning and adherence to POH guidelines are essential for safe and effective climbs.

Emergency Procedures

Emergency procedures in the Cessna 172N POH outline protocols for engine failure, system malfunctions, and emergency landings. Staying calm and following checklists ensures safe outcomes.

Engine Failure Protocols

Engine failure protocols in the Cessna 172N POH emphasize quick, calm actions. Pilots should secure the engine, feather the propeller if possible, and declare an emergency. The manual specifies procedures for identifying the cause and executing a controlled descent. Proper fuel management and altitude adjustments are critical. The POH also outlines steps for landing in safe areas, ensuring passenger safety. Regular training drills and familiarity with these protocols are essential for effective response. Adherence to the POH’s guidelines maximizes safety outcomes in such critical situations.

System Malfunctions and Recovery

The Cessna 172N POH details procedures for handling system malfunctions, such as electrical or hydraulic failures. Pilots are advised to identify the issue, isolate affected systems, and follow specific recovery steps. The manual emphasizes prioritizing safety, maintaining aircraft control, and using checklists for structured responses. Recovery often involves switching to backup systems or alternate configurations. The POH also provides guidelines for notifying air traffic control and preparing for emergency landings if necessary. Timely and precise actions are critical to mitigate risks and ensure safe outcomes. Regular practice of these protocols is strongly recommended.

Emergency Landing Techniques

The Cessna 172N POH outlines emergency landing techniques to ensure safety in critical situations. Pilots should maintain control, assess landing conditions, and secure the aircraft systems. Engine failure procedures include glide techniques and field selection. The POH emphasizes using checklists for structured responses. Communication with air traffic control is crucial, and landing without power requires precise airspeed control. In confined areas, a curved approach may be necessary. The manual stresses the importance of staying calm, following procedures, and prioritizing passenger safety. Proper training and practice are essential for effective execution of these techniques.

Maintenance and Servicing

Regular maintenance is crucial for the Cessna 172N’s safety and performance. The POH provides detailed guidelines for inspections, fluid checks, and scheduled servicing to ensure compliance and longevity.

Scheduled Maintenance Requirements

The Cessna 172N requires regular maintenance to ensure safety and performance. The POH outlines specific intervals for inspections, including the 100-hour inspection and annual inspection. Oil changes are recommended every 50 hours, and the air filter should be cleaned or replaced as specified. Compliance with Cessna’s maintenance manual is mandatory. Additionally, tire pressure checks and propeller inspections are essential. Adhering to these schedules ensures the aircraft remains airworthy and operates within manufacturer guidelines. Proper record-keeping is also emphasized to maintain compliance and track maintenance history.

Key Inspection Points

Key inspections for the Cessna 172N include checking tire pressure (31 PSI for nose wheel), fuel quality, and oil levels. Control surfaces must be inspected for damage or wear. The propeller should be checked for nicks or cracks, and the landing gear examined for proper function. Regular inspection of these critical areas ensures the aircraft remains safe and airworthy. These checks are detailed in the POH to guide pilots and mechanics in maintaining optimal aircraft condition and performance.

Fluids and Lubricants Specification

The Cessna 172N requires specific fluids to ensure optimal performance and longevity. The aircraft uses 100/130 grade aviation fuel (green-dyed), which must meet ASTM D910 standards. Engine oil should be straight-weight or multi-viscosity aircraft oil, conforming to SAE J1966 or MIL-L-6082 specifications. Hydraulic fluid and coolant must also meet specified standards to maintain system integrity. Adhering to these guidelines is critical to prevent engine damage and ensure reliable operation, as detailed in the POH.

The Cessna 172N POH serves as an essential resource for pilots, providing detailed insights into aircraft operations, performance, and maintenance. By following the guidelines outlined, pilots can ensure safe and efficient flights, maximizing the aircraft’s capabilities while adhering to safety standards. Regular review of the POH is crucial for staying informed and maintaining proficiency, making it an indispensable tool for every Cessna 172N operator.

wahl guide combs

Wahl guide combs are essential attachments for clippers, designed to achieve precise cutting lengths and styles․ They offer versatility for both professionals and home users, ensuring consistency and ease in grooming; Available in various sizes and materials, these combs enhance trimming accuracy, making them a must-have for clean, professional-looking results․

1․1 Overview of Wahl Guide Combs

Wahl guide combs are high-quality attachments designed to fit Wahl clippers, offering precise cutting lengths for various hairstyles․ Made from durable materials like stainless steel and engineering-grade plastics, they ensure long-lasting performance․ These combs are available in different sizes, including standard, premium, and specialized options, catering to diverse grooming needs․ They are easy to attach and provide consistent results, making them a popular choice for both professionals and home users․

1․2 Importance of Guide Combs in Grooming

Guide combs are indispensable for achieving precise, even cuts in grooming․ They prevent unevenness and ensure consistent results, whether for professional styling or home use․ Wahl guide combs are designed to enhance accuracy, making them a crucial tool for maintaining clean, polished looks․ Their versatility across different hair types and lengths ensures they meet a wide range of grooming needs effectively․

Types of Wahl Guide Combs

Wahl offers Standard, Premium, and Stainless Steel guide combs, each designed for durability and specific grooming needs, ensuring precise cuts and long-lasting performance for all users․

2․1 Standard Guide Combs

Standard Wahl guide combs are durable, versatile attachments designed for everyday use․ They come in various sizes to accommodate different cutting lengths, ensuring precise control for consistent results․ Made from high-quality materials, these combs are compatible with most Wahl clippers, making them ideal for both professional barbers and home users seeking reliable grooming tools․ Their ease of use and wide range of attachments make them a popular choice for achieving professional-looking styles effortlessly․

2․2 Premium Guide Combs

Premium Wahl guide combs are crafted with engineering-grade materials, offering 70% greater durability than standard combs․ Designed for professional performance, they provide precise control and consistent results․ These combs are color-coded for easy identification and feature a secure fit on compatible clippers․ Ideal for barbers and stylists, premium guide combs deliver superior reliability and longevity, making them a worthwhile investment for high-quality grooming experiences․

2․3 Stainless Steel Guide Combs

Wahl stainless steel guide combs are built for exceptional durability and resistance to rust․ Designed for precise cutting, they offer a long-lasting performance․ These combs are compatible with specific Wahl clippers and blades, ensuring smooth operation․ Ideal for both professional and home use, stainless steel guide combs provide consistent results and are available in various sizes to cater to different grooming needs․

Sizes and Cutting Lengths

Wahl guide combs come in various sizes, from 1/16″ to 1″, offering precise cutting lengths․ They cater to different grooming needs, ensuring versatility and accuracy for any style․

3․1 Common Cutting Lengths

Wahl guide combs are available in popular lengths like 1/16″, 1/8″, 1/4″, 1/2″, and 1″․ These sizes cater to common grooming needs, from fades to trims․ The 1/4″ and 1/2″ combs are ideal for medium-length styles, while the 1/8″ and 1/16″ are perfect for shorter, cleaner cuts․ Wahl’s color-coded system helps users easily identify and remember their preferred lengths, ensuring consistent results․

3․2 Specialized Sizes for Specific Needs

Wahl offers specialized guide combs for unique grooming requirements, such as longer styles or precise trims․ Sizes like 5/8″ and 1″ cater to those needing extended lengths, while shorter options like 3mm provide ultra-fine detailing․ These combs are ideal for achieving specific looks, such as undercuts or blending, ensuring versatility for both professionals and home users․ Wahl’s color-coded system aids in quick identification, enhancing usability․

Materials and Durability

Wahl guide combs are crafted from engineering-grade materials for exceptional durability․ Stainless steel options offer enhanced strength, while premium combs are 70% stronger than standard versions, ensuring long-lasting performance․

4․1 Engineering-Grade Materials

Wahl guide combs are made from high-quality, engineering-grade materials, ensuring exceptional durability and performance․ These materials are designed to withstand regular use, maintaining their shape and functionality over time․ The premium guide combs, for instance, are 70% stronger than standard versions, offering enhanced reliability․ This robust construction ensures consistent cutting results, making them ideal for both professional groomers and home users․ Their durability guarantees long-term value and satisfaction․

4․2 Stainless Steel Guide Combs

Wahl stainless steel guide combs are renowned for their exceptional durability and resistance to rust․ Made from high-quality stainless steel, these combs are built to last, maintaining their sharpness and precision over time․ They are available in various sizes, catering to different grooming needs, and are compatible with specific Wahl clippers․ Their sleek design and robust construction ensure smooth, consistent cuts, while their ease of cleaning enhances maintenance․

How to Use Wahl Guide Combs

Attach Wahl guide combs securely to clippers for precise cutting lengths․ Ensure proper fit and alignment to avoid uneven results․ Start with small sections, using smooth, steady strokes for even trims․ This ensures clean, professional-looking cuts every time, perfect for achieving your desired hairstyle effortlessly․

5․1 Attaching Guide Combs to Clippers

Attaching Wahl guide combs to clippers is straightforward․ Ensure the clipper blade is clean and dry․ Align the comb with the blade, securing it firmly until it clicks․ Proper alignment prevents shifting during use․ For different cutting lengths, switch combs as needed․ Always refer to the clipper model’s compatibility guide for correct attachment procedures to maintain optimal performance and safety․

5․2 Tips for Smooth and Even Cuts

For smooth, even cuts, start with clean, detangled hair․ Use the right guide comb size for your desired length․ Hold the clippers firmly at a slight angle, gliding them in the direction of hair growth․ Work in small sections, maintaining steady pressure․ Avoid applying too much force, which can cause unevenness․ Regularly clean and oil your clippers to ensure optimal performance and precise results every time․

Compatibility with Wahl Clippers

Wahl guide combs are designed to fit various Wahl clippers, including popular models like Senior and Magic Clip․ Ensure compatibility by using the correct blade size for optimal performance․

6․1 Compatible Clipper Models

Wahl guide combs are compatible with various Wahl clippers, including the 5 Star Senior, Magic Clip, and Professional Taper models․ These clippers are designed to work seamlessly with Wahl’s attachment combs, ensuring a secure fit and precise cutting․ Compatibility ensures optimal performance and prevents issues like slipping or improper blade alignment, making it essential to pair guide combs with the correct clipper model for the best results․

6․2 Blade Requirements for Guide Combs

Wahl guide combs require specific blade types or settings to function properly․ Blades such as the 10, 15, or 30 are commonly recommended for use with guide combs․ Using the correct blade ensures a secure fit and optimal performance․ Always refer to your clipper’s manual for compatibility details to achieve the best cutting results with Wahl guide combs․

Maintenance and Care

Regularly clean Wahl guide combs with a soft brush and store them in a dry place to maintain their quality and longevity for optimal performance․

7․1 Cleaning Guide Combs

Regular cleaning is crucial for maintaining Wahl guide combs․ Use a soft-bristle brush to remove loose hair and debris․ For deeper cleaning, rinse combs with mild soap and warm water, then dry thoroughly to prevent rust․ Avoid harsh chemicals or abrasive materials that may damage the combs․ Proper cleaning ensures optimal performance and longevity of your Wahl guide combs․

7․2 Storage Tips

Store Wahl guide combs in a cool, dry place to prevent rust and damage․ Use a protective case or pouch to keep them organized and scratch-free․ Avoid stacking combs to maintain their shape and alignment․ Regularly check for wear or damage before storage․ Properly storing your guide combs ensures they remain in excellent condition for future use, whether for personal or professional grooming needs․

Troubleshooting Common Issues

Common issues with Wahl guide combs include improper fitting or uneven cuts․ Ensure proper alignment with blades and use the correct comb size for desired results․

8․1 Guide Combs Not Fitting Properly

Issues with guide combs not fitting properly often stem from incorrect sizing or incompatible clipper models․ Ensure the comb matches your clipper’s blade type and size․ Clean the clipper and comb regularly to remove hair debris, which can cause improper alignment․ If the problem persists, check for worn or damaged teeth and replace the comb if necessary for a secure fit․

8․2 Achieving Desired Cutting Length

To achieve the desired cutting length, ensure the guide comb aligns with your clippers’ blade size and type․ Start with a longer comb and gradually decrease the length for precision․ Use Wahl’s color-coded system or numbered guides for consistency․ Always maintain the comb’s quality, as worn teeth can lead to uneven cuts․ Proper attachment and clean blades are key for accurate results, ensuring a smooth and even haircut every time․

Wahl Guide Combs for Different Hair Types

Wahl guide combs are designed to cater to various hair types, ensuring precise cuts for fine, thick, or coarse hair․ Their engineered materials and adjustable lengths minimize tangles and provide control, making them suitable for all hair textures and styles․

9․1 Guide Combs for Fine Hair

Wahl guide combs for fine hair are designed with precision to prevent damage and ensure a clean cut․ Made from durable, engineering-grade materials, these combs feature smooth edges and precise spacing to glide effortlessly through fine strands․ They minimize tangles and pulling, making them ideal for achieving a neat, even style without causing breakage or discomfort․

9․2 Guide Combs for Thick or Coarse Hair

Wahl guide combs for thick or coarse hair are crafted for strength and durability, ensuring smooth cuts without pulling or breaking strands․ Premium and stainless steel options provide extra rigidity, while color-coded sizes help maintain consistency․ These combs are designed to glide effortlessly through dense hair, delivering precise, even results with minimal effort, making them ideal for achieving professional-looking styles on thicker hair types․

Wahl guide combs are durable, versatile tools that enhance precision and ease in grooming․ Their premium materials and wide range of sizes cater to diverse needs, ensuring consistent results․

10․1 Final Thoughts on Wahl Guide Combs

Wahl guide combs are indispensable tools for precise grooming, offering durability and versatility․ They cater to diverse needs, from fine to thick hair, ensuring consistent results․ With options ranging from standard to premium and stainless steel, these combs provide long-lasting performance and ease of use, making them a valuable investment for both professionals and home users seeking high-quality grooming outcomes․

PDF

honda shadow 750 service manual pdf

The Honda Shadow 750 Service Manual is a comprehensive guide for maintaining and repairing your motorcycle. It includes detailed procedures, wiring diagrams, and specifications to ensure proper servicing. Available as a PDF, it covers models like the VT750C2 and VT750C, providing step-by-step instructions for DIY enthusiasts and professionals. Regular updates and model-specific information make it an essential resource for owners seeking to keep their bike in optimal condition.

1.1 Overview of the Honda Shadow 750

The Honda Shadow 750, known for its reliability and classic design, is a popular cruiser motorcycle. Available in models like the Shadow Spirit (VT750C2), Aero (VT750C), and Phantom (VT750C2B), it features a 745cc V-twin engine, smooth drivetrain, and comfortable ergonomics. With a fuel capacity of 3.7 gallons, it offers a balance of power and efficiency. The Shadow 750 series, produced from 2001 to 2007, is well-supported by comprehensive service manuals, making maintenance and repairs accessible for owners and enthusiasts.

1.2 Importance of the Service Manual

The service manual is crucial for maintaining and repairing the Honda Shadow 750. It provides detailed procedures, wiring diagrams, and specifications, ensuring proper servicing. Essential for both DIY enthusiasts and professionals, it offers step-by-step instructions, safety precautions, and troubleshooting guides. Adhering to the manual’s guidelines helps maintain the motorcycle’s performance and longevity, making it a vital resource for owners seeking to keep their bike in optimal condition.

Where to Download the Honda Shadow 750 Service Manual PDF

The Honda Shadow 750 Service Manual PDF can be downloaded from official Honda sources or reputable third-party websites like VT750DC.com, ensuring authenticity and reliability.

2.1 Official Honda Sources

Official Honda sources provide the most reliable and accurate service manuals for the Shadow 750. Websites like Honda’s official service portal or authorized dealers offer downloadable PDFs. These manuals are tailored to specific models, ensuring compatibility and adherence to manufacturer standards. Accessing these resources typically requires a subscription or purchase, guaranteeing authenticity and comprehensive coverage of maintenance procedures.

2.2 Third-Party Websites and Forums

Third-party websites and forums offer alternative access to the Honda Shadow 750 service manual PDF. Sites like vt750dc.com and various motorcycle forums provide downloadable links, often shared by enthusiasts. While convenient, ensure the source is reputable to avoid outdated or inaccurate information. These platforms may also include community contributions and tips, enhancing the manual’s utility for DIY enthusiasts.

Key Sections of the Honda Shadow 750 Service Manual

The manual covers essential maintenance, repair procedures, wiring diagrams, and technical specifications. It provides detailed instructions for servicing, ensuring optimal performance and longevity of the motorcycle.

3.1 Maintenance and Repair Procedures

The Honda Shadow 750 Service Manual provides detailed maintenance schedules and repair procedures. It includes step-by-step instructions for routine checks, oil changes, tire inspections, and complex repairs. The manual covers troubleshooting common issues and offers guidance for replacing parts like brakes, suspension, and electrical components. Designed for both DIY enthusiasts and professionals, it ensures that all servicing is done safely and effectively, preventing potential problems and extending the motorcycle’s lifespan.

3.2 Wiring Diagrams and Technical Specifications

The Honda Shadow 750 Service Manual includes detailed wiring diagrams and technical specifications. These diagrams illustrate the electrical system’s layout, making it easier to diagnose and repair issues. Technical specifications cover engine performance, torque values, and fluid capacities, ensuring accurate servicing. This section is crucial for understanding the motorcycle’s electrical and mechanical systems, aiding in precise repairs and customizations while adhering to manufacturer standards.

Model-Specific Service Manuals

The Honda Shadow 750 Service Manual offers model-specific guides for Spirit VT750C2, Aero VT750C, and Phantom VT750C2B. Each manual is tailored to the bike’s unique engineering, ensuring precise maintenance and repair instructions for optimal performance and longevity.

4.1 Honda Shadow Spirit VT750C2

The Honda Shadow Spirit VT750C2 service manual provides detailed instructions for maintenance and repair of this shaft-driven motorcycle. Covering years 2007-2009, the manual includes diagrams, troubleshooting guides, and specifications. Available as a PDF, it ensures owners can perform tasks efficiently, from routine checks to complex repairs, keeping their Spirit VT750C2 in peak condition with accurate guidance.

4.2 Honda Shadow Aero VT750C

The Honda Shadow Aero VT750C service manual offers a detailed guide for servicing this shaft-driven cruiser. Covering models from 2005-2007, the manual includes wiring diagrams, repair procedures, and technical specifications. Available as a PDF, it provides essential information for owners and mechanics to maintain and repair the Aero VT750C, ensuring optimal performance and longevity with precise instructions.

4.3 Honda Shadow Phantom VT750C2B

The Honda Shadow Phantom VT750C2B service manual provides specific guidance for this sleek, shaft-driven model. Available as a PDF, it covers troubleshooting, maintenance, and repair procedures tailored to the 2015 Phantom. Detailed wiring diagrams and technical specifications ensure accurate servicing. This manual is crucial for owners seeking to maintain their VT750C2B’s performance and address common issues effectively, adhering to Honda’s standards.

Tools and Equipment Required for Service

Essential tools include wrenches, screwdrivers, and torque wrenches. Recommended lubricants and genuine Honda parts ensure optimal performance. The manual lists all necessary equipment for DIY maintenance and repairs.

5.1 Essential Tools for DIY Maintenance

The Honda Shadow 750 service manual recommends essential tools like a torque wrench, socket set, screwdrivers, pliers, and a tire pressure gauge. These tools are crucial for routine maintenance tasks such as oil changes, brake inspections, and tire rotations. Protective gear like gloves and goggles is also advised to ensure safety during repairs. Always refer to the manual for specific tool requirements to avoid damage or injury.

5.2 Recommended Lubricants and Parts

The Honda Shadow 750 service manual specifies the use of Honda Genuine or equivalent parts and lubricants for optimal performance. Recommended engine oils include SE or SF grade, while gear oils should meet GL-4 standards; Using genuine parts ensures compatibility and longevity, aligning with manufacturer guidelines for reliability and safety. Always consult the manual for specific lubricant and part recommendations tailored to your motorcycle’s needs.

Common Issues and Troubleshooting

The Honda Shadow 750 service manual details troubleshooting steps for common issues, ensuring proper diagnosis and repair. It guides owners through resolving problems efficiently, adhering to manufacturer guidelines for optimal performance and safety.

6.1 Frequently Encountered Problems

Common issues with the Honda Shadow 750 include ignition system malfunctions, transmission problems, and electrical faults. Riders often report difficulties with the carburetor, especially on older models, requiring adjustments or replacements. Additionally, oil leaks and brake system wear are frequent concerns. The service manual provides detailed troubleshooting guides, enabling owners to diagnose and address these issues effectively, ensuring optimal performance and longevity of the motorcycle.

6.2 Diagnostic Procedures

Diagnostic procedures for the Honda Shadow 750 involve systematic checks of electrical, fuel, and mechanical systems. Use the wiring diagrams in the service manual to trace faults. Test components like spark plugs, fuel injectors, and sensors. Consult error codes if equipped with an OBD system. Always follow manufacturer guidelines to ensure accurate diagnoses and safe repairs, preventing further damage to the motorcycle.

Safety Precautions and Guidelines

Always wear protective gear and ensure a well-ventilated workspace. Follow proper lifting techniques and use jack stands for stability. Adhere to manufacturer guidelines to prevent injuries.

7.1 General Safety Tips

Always wear protective gear, including gloves and safety glasses, when performing maintenance or repairs. Ensure the motorcycle is on a level surface and use jack stands for stability. Disconnect the battery to prevent accidental starts. Follow proper lifting techniques to avoid injury. Keep loose clothing and long hair tied back. Never work near open flames or sparks, and ensure good ventilation when using chemicals. Refer to the manual for specific safety guidelines tailored to your Honda Shadow 750 model.

7.2 Protective Gear and Workspace Setup

Always wear protective gear such as gloves, safety glasses, and steel-toe boots when working on your Honda Shadow 750. Set up your workspace on a level surface, using jack stands to stabilize the motorcycle and ensure it won’t tip over. Keep the area clean and well-lit to avoid tripping hazards and ensure visibility. Refer to the service manual for specific safety guidelines tailored to your model.

Step-by-Step Repair and Maintenance Guides

The Honda Shadow 750 Service Manual provides detailed, step-by-step instructions for maintenance and repairs. From oil changes to complex engine work, it ensures clarity and precision for DIY enthusiasts and professionals alike, helping riders maintain their motorcycle in peak condition.

8.1 Routine Maintenance Schedule

The Honda Shadow 750 Service Manual outlines a detailed routine maintenance schedule to ensure optimal performance and longevity. It specifies intervals for oil changes, tire inspections, brake pad replacements, and spark plug maintenance. Regular checks for chain tension, coolant levels, and air filter condition are also emphasized. Adhering to this schedule helps prevent mechanical issues and ensures the motorcycle runs efficiently and safely over time.

8.2 Detailed Repair Instructions

The Honda Shadow 750 Service Manual provides detailed repair instructions for various components, including engine overhauls, transmission repairs, and electrical system troubleshooting. Step-by-step guides, accompanied by exploded diagrams, help users identify and replace faulty parts. Instructions emphasize the use of genuine Honda parts and adherence to torque specifications, ensuring safe and effective repairs. This section is invaluable for both novice and experienced mechanics to address complex issues confidently.

Accessories and Upgrades

The Honda Shadow 750 Service Manual highlights compatible accessories and upgrades to enhance performance and customize your motorcycle. It includes details on exhaust systems, handlebars, and seats.

9.1 Performance Enhancements

The Honda Shadow 750 Service Manual provides insights into performance-enhancing modifications. It covers air intake upgrades, exhaust system improvements, and engine tuning tips. Additionally, it details how to optimize fuel injection settings and install high-performance spark plugs. These enhancements can boost power output and improve overall ride quality, ensuring your motorcycle runs at peak efficiency. Always follow manufacturer guidelines for best results.

9.2 Customization Options

The Honda Shadow 750 Service Manual highlights various customization options to personalize your motorcycle. Owners can explore aftermarket parts, such as custom paint jobs, handlebars, and seats. Additionally, the manual provides guidance on installing accessory lighting, exhaust systems, and decorative trim. These modifications allow riders to tailor their bike’s appearance and functionality while maintaining reliability and performance, as outlined in the service manual.

User Reviews and Feedback

Users praise the Honda Shadow 750 Service Manual for its clarity and comprehensiveness. Many find it an invaluable resource for DIY repairs and maintenance. Feedback highlights its user-friendly nature, making complex procedures accessible to both enthusiasts and professionals; Riders appreciate the detailed instructions and troubleshooting guides, emphasizing its importance for optimal bike performance and customization.

10.1 Experiences with the Service Manual

Many users have shared positive experiences with the Honda Shadow 750 Service Manual, praising its clarity and detailed instructions. Riders appreciate the comprehensive troubleshooting guides and step-by-step repair procedures. The PDF format allows easy access on various devices, making it a convenient resource for both professionals and DIY enthusiasts. Overall, the manual has proven to be an indispensable tool for maintaining and customizing the Honda Shadow 750 effectively.

10;2 Community Recommendations

The community highly recommends the Honda Shadow 750 Service Manual for its detailed instructions and clarity. Many forums and groups emphasize its importance for DIY repairs and maintenance. Riders often suggest combining it with genuine Honda parts for optimal results. The manual’s availability in PDF format has made it a trusted resource among enthusiasts, ensuring reliable guidance for all motorcycle servicing needs.

Legal and Warranty Considerations

Using the Honda Shadow 750 Service Manual ensures compliance with manufacturer guidelines, maintaining warranty validity. Always use genuine Honda parts and follow authorized procedures to avoid legal issues.

11.1 Warranty Information

The Honda Shadow 750 Service Manual emphasizes adhering to manufacturer guidelines to maintain warranty coverage. Using genuine Honda parts and authorized repair procedures ensures compliance, preventing voidance of warranty. Modifications or unauthorized repairs may invalidate coverage. Always refer to the manual for specific warranty terms and conditions applicable to your motorcycle model and year. Compliance ensures continued protection and reliability of your vehicle.

11.2 Compliance with Manufacturer Guidelines

Compliance with Honda’s guidelines is crucial for ensuring the safety, reliability, and performance of your Shadow 750. The service manual emphasizes using genuine Honda parts and following authorized procedures to maintain compliance. Deviating from these guidelines may result in reduced reliability or potential safety hazards. Always adhere to the manufacturer’s instructions to ensure optimal results and avoid voiding your warranty coverage.

The Honda Shadow 750 Service Manual is an invaluable resource for owners, offering comprehensive guidance for maintenance, repair, and troubleshooting. Regular use ensures optimal performance, safety, and longevity of your motorcycle. Follow the manual’s instructions carefully to maintain your bike’s health and enjoy a smooth riding experience for years to come.

12.1 Summary of Key Points

The Honda Shadow 750 Service Manual is a detailed guide covering maintenance, repairs, and troubleshooting. It includes wiring diagrams, technical specs, and model-specific info. Available as a PDF, it aids DIY enthusiasts and professionals in keeping the bike in optimal condition. Following the manual ensures safety, performance, and longevity. Regular updates and comprehensive instructions make it an indispensable resource for owners.

12.2 Encouragement for Regular Maintenance

Regular maintenance is essential for optimal performance, safety, and longevity of your Honda Shadow 750; By following the service manual’s guidelines, you can prevent potential issues, enhance riding comfort, and protect your investment. Stay proactive with routine checks, proper lubrication, and timely repairs to ensure your bike runs smoothly for years to come.

nuwave oven manual pdf

Welcome to the NuWave Oven Manual‚ your ultimate guide to mastering this innovative cooking appliance. Discover how to prepare healthier‚ faster meals with ease and precision.

Key Features and Benefits

The NuWave Oven offers infrared technology for faster cooking‚ multi-layered cooking capabilities‚ and a dual rack system‚ ensuring healthier meals with minimal effort and maximum flavor.

2.1. Convenience and Ease of Use

The NuWave Oven is designed for simplicity‚ featuring intuitive control dials and a user-friendly interface. With pre-set settings and a clear digital display‚ you can effortlessly navigate cooking options. The manual provides step-by-step guidance‚ ensuring even novice users can achieve perfect results. The oven’s compact design saves counter space‚ while its portability makes it easy to move. Cleaning is a breeze with dishwasher-safe parts‚ adding to its convenience. Whether you’re cooking for one or a family‚ the NuWave Oven’s ease of use ensures a hassle-free culinary experience‚ allowing you to focus on creativity and enjoyment in the kitchen. This makes it an ideal choice for busy households seeking efficient meal preparation.

2.2. Health Benefits and Nutritional Value

Cooking with the NuWave Oven offers numerous health benefits‚ as it allows for reduced oil usage‚ making meals healthier and lower in fat. The oven’s precise temperature control ensures that nutrients and flavors are retained‚ preserving the natural goodness of your food. By using infrared and convection technology‚ the NuWave Oven cooks evenly without overcooking‚ helping to maintain essential vitamins and minerals. This method also prevents the loss of water-soluble nutrients often associated with traditional boiling. The manual provides tips on how to maximize nutritional value‚ ensuring your dishes remain healthy and delicious. With the NuWave Oven‚ you can enjoy guilt-free‚ nutrient-rich meals that cater to various dietary needs and preferences.

2.3. Versatility in Cooking Techniques

The NuWave Oven excels in offering a wide range of cooking techniques‚ making it a versatile addition to any kitchen. Whether you’re baking‚ roasting‚ grilling‚ or dehydrating‚ the oven’s advanced infrared and convection technologies ensure consistent results. The manual provides detailed guidance on how to achieve perfect cooking outcomes for various dishes‚ from crispy roasted vegetables to tender meats. Additionally‚ the oven’s ability to cook multiple layers of food simultaneously allows for efficient meal preparation. With customizable temperature and time settings‚ you can experiment with new recipes or adapt your favorite dishes to suit the NuWave Oven’s capabilities. This versatility makes it ideal for home cooks and culinary enthusiasts alike‚ offering endless possibilities for creative and delicious meals.

Operating Instructions

Preheat the oven‚ place food on racks‚ and use control dials to set time and temperature for perfect cooking results every time.

3.1. Control Dials and Settings

The NuWave Oven features intuitive control dials that simplify cooking. Use the cook time dial to select up to 12 hours and the temperature dial for precise heat control. Press start to begin. These settings ensure consistent results for various dishes. Always refer to the manual for specific guidelines. Proper use enhances cooking efficiency and safety.

3.2. Setting Cooking Time and Temperature

Setting the cooking time and temperature on your NuWave Oven is straightforward. The cook time dial allows you to set durations up to 12 hours‚ perfect for slow cooking. The temperature dial offers precise control‚ ranging from 100°F to 350°F. For optimal results‚ refer to the manual’s guidelines for specific food types. Always ensure the oven is preheated before cooking. Properly setting these controls ensures evenly cooked meals and enhances flavor. Remember to adjust settings based on the recipe for best outcomes. This feature makes the NuWave Oven versatile for various cooking techniques‚ from roasting to baking.

Maintenance and Troubleshooting

Regularly clean the NuWave Oven to maintain performance. Wipe surfaces with a damp cloth and avoid abrasive cleaners. For troubleshooting‚ refer to the manual for common issues and solutions.

4.1. Cleaning and Care Tips

Proper cleaning ensures optimal performance of your NuWave Oven. Always unplug the appliance before cleaning. Use a soft‚ damp cloth to wipe down the exterior and interior surfaces. Avoid harsh chemicals or abrasive scrubbers‚ as they may damage the finish. For tougher stains‚ mix equal parts water and white vinegar on a soft cloth. The cooking rack and pan should be washed with mild soap and warm water after each use. Regularly cleaning the air vents prevents grease buildup and maintains airflow. Refer to the manual for detailed instructions to keep your NuWave Oven in pristine condition and ensure longevity.

4.2. Common Issues and Solutions

If your NuWave Oven isn’t turning on‚ ensure it’s properly plugged in and the outlet is working. For uneven cooking‚ check that food is evenly spaced and the rack is correctly positioned. If the oven produces excessive noise‚ clean the interior and vents to remove grease buildup. Water spots can be avoided by drying the oven thoroughly after cleaning. If the digital display malfunctions‚ reset the unit by unplugging it for 30 seconds. Refer to the manual for troubleshooting guides tailored to specific models. Regular maintenance and proper care can prevent many issues. Always consult the manual or contact customer support for persistent problems to ensure optimal performance and longevity of your NuWave Oven.

Recipes and Cooking Guide

Explore a variety of delicious recipes tailored for the NuWave Oven‚ from hearty main dishes to healthy snacks‚ all designed to enhance your cooking experience with precision and flavor.

5.1. Popular Recipes for the NuWave Oven

The NuWave Oven offers a diverse range of popular recipes‚ from mouthwatering fish cakes to delectable sandwiches‚ each crafted to bring out the best flavors using its advanced cooking technology. Users can enjoy healthy and tasty meals with minimal effort‚ thanks to the appliance’s ability to cook efficiently while retaining nutrients. With the provided manual‚ you can explore step-by-step guides for preparing these dishes‚ ensuring each meal is cooked to perfection. Whether you’re a novice or an experienced cook‚ the NuWave Oven’s recipes cater to all skill levels‚ making it a versatile addition to any kitchen. Experiment with various ingredients and techniques to create memorable culinary experiences.

5.2. Using the Manual for Cooking Techniques

The NuWave Oven manual is an essential resource for mastering various cooking techniques‚ ensuring you get the most out of your appliance. From baking and roasting to grilling and infrared cooking‚ the manual provides detailed guidance for achieving perfect results. It includes step-by-step instructions for setting the right temperature‚ timing‚ and rack positions‚ making it easier to adapt recipes to your preferences. Whether you’re cooking fish cakes‚ sandwiches‚ or other dishes‚ the manual offers tips to enhance flavor and texture. With its comprehensive cooking guide‚ you can explore multi-layered cooking and experiment with new recipes confidently. The manual also highlights the benefits of healthier cooking methods‚ helping you prepare nutritious meals effortlessly. By following the techniques outlined‚ you can unlock the full potential of your NuWave Oven and enjoy restaurant-quality dishes at home.

Accessories and Additional Equipment

To enhance your cooking experience with the NuWave Oven‚ consider exploring its range of accessories and additional equipment. These include durable cooking racks‚ non-stick trays‚ and precision thermometers‚ which are designed to optimize performance and versatility. The manual highlights compatible tools like the dual cooking rack‚ perfect for multi-layered cooking‚ and specialized trays for baking and roasting. Additionally‚ the NuWave Oven Cookbook offers 101 delicious recipes‚ providing inspiration for diverse meals. Accessories like the PIC Induction Cooktop and Sous Vide Combi Steam Oven can further expand your culinary possibilities. These tools are crafted to work seamlessly with the NuWave Oven‚ ensuring you achieve professional-grade results. By investing in these accessories‚ you can unlock new cooking techniques and enjoy a more convenient‚ enjoyable cooking journey.

PDF

far from the madding crowd pdf

Far from the Madding Crowd is Thomas Hardy’s fourth novel, published in 1874. Set in Wessex, it explores themes of love, independence, and rural life through Bathsheba Everdene’s journey, making it a timeless classic in English literature.

1.1 Overview of the Novel

Far from the Madding Crowd is a captivating novel by Thomas Hardy, set in the rural landscapes of Wessex. The story centers around Bathsheba Everdene, a strong-willed and independent woman, and her complex relationships with three men: Gabriel Oak, Sergeant Troy, and Mr. Boldwood. Bathsheba’s journey explores themes of love, independence, and the challenges of rural life. The novel begins with Bathsheba inheriting a farm and navigating societal expectations, while Gabriel Oak, a devoted shepherd, remains a constant presence in her life. Hardy’s vivid portrayal of nature and human emotions creates a timeless tale of resilience and personal growth, making it a beloved classic in English literature.

1.2 Author Background: Thomas Hardy

Thomas Hardy, born on June 2, 1840, in Dorchester, England, was a renowned novelist and poet; His early life in the rural county of Dorset deeply influenced his writing, shaping the fictional region of Wessex. Hardy’s work often explored themes of human struggle, nature, and societal constraints. Before gaining fame as a writer, he worked as an architect. His literary career flourished with novels like Tess of the d’Urbervilles and Jude the Obscure. Hardy’s writing style, blending realism with philosophical introspection, earned him a lasting place in English literature. His works remain widely read and adapted, reflecting his profound insight into human nature and the natural world.

Downloading “Far from the Madding Crowd” in PDF

Download Far from the Madding Crowd in PDF from sources like ManyBooks, Project Gutenberg, or Google Books. These platforms offer free, legal access to the novel, ensuring a seamless reading experience.

2.1 Free PDF Sources: ManyBooks, Project Gutenberg, and More

ManyBooks, Project Gutenberg, and Google Books offer free PDF downloads of Far from the Madding Crowd. These platforms provide legal and safe access to the novel, ensuring readers can enjoy Hardy’s work without registration. ManyBooks features a clean, downloadable version, while Project Gutenberg offers multiple formats, including PDF. Additionally, Google Books includes scanned copies from libraries, preserving the original text. These sources are reliable and free, making classic literature accessible to everyone. They are ideal for students, researchers, and enthusiasts who prefer digital formats for convenience and portability.

2.2 Legal and Safe Download Options

Downloading Far from the Madding Crowd as a PDF is straightforward and safe when using reputable sources. ManyBooks, Project Gutenberg, and Google Books provide legal, free versions of the novel, ensuring compliance with copyright laws. These platforms are trusted for their commitment to preserving classic literature while offering easy access. Users can download without registration, and the files are free from malware, making them secure choices. Additionally, these sources often provide multiple formats, including PDF, ePub, and Kindle, catering to different reader preferences. Legal downloads not only protect the user but also respect the author’s work, making them the best choice for accessing Hardy’s timeless novel.

Plot Summary

Far from the Madding Crowd follows Bathsheba Everdene, a strong-willed woman navigating love, independence, and rural challenges in 19th-century Wessex, alongside Gabriel Oak, Mr. Boldwood, and Sergeant Troy.

3.1 Main Characters: Bathsheba Everdene and Gabriel Oak

Bathsheba Everdene is the protagonist, a strong-willed and independent woman navigating societal expectations and personal desires. Her journey reflects her resilience and complexity. Gabriel Oak, a kind-hearted shepherd, embodies simplicity and honesty, offering unwavering support. Their relationship evolves from admiration to mutual respect, highlighting themes of loyalty and unspoken love. Bathsheba’s interactions with other suitors, like Mr. Boldwood and Sergeant Troy, contrast with Gabriel’s steadfast nature, showcasing her growth and ultimate realization of true value in relationships. Together, they represent Hardy’s exploration of human emotions and rural life’s challenges.

3.2 Key Themes: Love, Independence, and Rural Life

At the heart of Far from the Madding Crowd lies the exploration of love, independence, and rural life. Love is depicted as complex, often marked by unrequited feelings and societal pressures, while independence, particularly for women, is a recurring theme through Bathsheba’s journey. Rural life is not just a backdrop but a central character, shaping the characters’ experiences and struggles. Hardy critiques the rigid social norms and the challenges of isolated agricultural communities. The novel also reflects on the tension between nature’s beauty and its harsh realities, mirroring the characters’ internal conflicts. These themes remain timeless, offering insights into human emotions and the enduring connection to the land.

Major Adaptations

Far from the Madding Crowd has been adapted into films, stage productions, and radio dramas, including the 2015 film starring Carey Mulligan and the 1967 version with Julie Christie, enhancing its enduring appeal and accessibility through various mediums.

4.1 Film Adaptations: 1967 and 2015 Versions

The 1967 film adaptation, directed by John Schlesinger, stars Julie Christie as Bathsheba Everdene and Peter Finch as William Boldwood, capturing the novel’s emotional depth and rural setting. The 2015 version, directed by Thomas Vinterberg, features Carey Mulligan as Bathsheba and Matthias Schoenaerts as Gabriel Oak, offering a fresh, visually stunning interpretation. Both films remain faithful to Hardy’s themes while bringing modern cinematic techniques to the story. The 1967 adaptation is noted for its lavish production, while the 2015 version emphasizes character complexity and the timeless relevance of Bathsheba’s independence. These films have introduced the novel to new audiences, ensuring its enduring legacy.

4.2 Stage Productions and Radio Dramas

Far from the Madding Crowd has been adapted into numerous stage productions and radio dramas, further cementing its place in literary and theatrical culture. Lifeline Theatre’s adaptation, for instance, was praised for its faithful rendering of Hardy’s themes, though some critics noted it felt more like an academic exercise than a dramatic spectacle. Radio adaptations, such as those by BBC Radio 4, have also brought the story to life through compelling voice acting and sound design. These adaptations highlight the novel’s timeless appeal, offering audiences new ways to engage with Bathsheba’s journey and the rural world Hardy so vividly portrayed. They serve as a testament to the novel’s enduring influence beyond the page.

Study Resources

Far from the Madding Crowd study resources include detailed guides and analysis tools like SparkNotes and LitCharts, offering insights into characters, themes, and plot. Free audiobook versions enhance learning by providing an engaging auditory experience, making complex themes more accessible for deeper understanding and analysis of Hardy’s work.

5.1 SparkNotes and LitCharts: Analysis and Study Guides

SparkNotes and LitCharts provide comprehensive study guides for Far from the Madding Crowd, offering detailed analysis of characters, themes, and plot. These resources are invaluable for students, featuring chapter summaries, critical essays, and study questions. LitCharts offers visual infographics, while SparkNotes includes analysis of key quotes. Both platforms help readers understand Hardy’s exploration of love, independence, and rural life. They are accessible online, making it easy to deepen your understanding of Bathsheba and Gabriel’s journeys. These guides are perfect for academic preparation or personal enrichment, ensuring a richer grasp of the novel’s complexities and historical context.

5.2 Free Audiobook Versions for Enhanced Learning

Free audiobook versions of Far from the Madding Crowd are available on platforms like Librivox and Google Books, offering a convenient way to experience Hardy’s classic novel. These audiobooks are narrated by volunteers and professionals, providing high-quality storytelling. They are ideal for students and readers who prefer auditory learning or want to complement their reading with listening. Platforms like Audible also offer free trials, allowing access to the audiobook version. These resources enhance understanding by bringing the novel’s complex characters and themes to life, making it easier to grasp the nuances of Bathsheba’s journey and the rural setting. They are perfect for both academic study and personal enjoyment.

The novel’s exploration of love, independence, and rural life continues to resonate, ensuring its relevance in modern times, making it a cherished literary classic.

6.1 Why “Far from the Madding Crowd” Remains Relevant

Far from the Madding Crowd remains relevant due to its timeless themes of love, independence, and the human struggle against societal expectations. Bathsheba Everdene’s journey as a strong, independent woman continues to inspire readers, offering a powerful exploration of gender roles and personal identity. The novel’s vivid portrayal of rural life and its challenges resonates with audiences today, highlighting the enduring connection between humanity and nature. Hardy’s deep insight into human emotions and complexities ensures the story’s universal appeal, making it a cherished classic that transcends generations. Its adaptability into films and stage productions further underscores its lasting impact on literature and culture.

6.2 Final Thoughts on the Novel’s Impact

Far from the Madding Crowd leaves a lasting impact as a profound exploration of human nature, love, and societal norms. Its timeless themes resonate with modern readers, offering insights into independence, resilience, and the complexities of relationships. Hardy’s vivid portrayal of rural life and his well-crafted characters, such as Bathsheba and Gabriel, create a deeply emotional and relatable story. The novel’s influence is evident in its adaptations across film, stage, and audio formats, ensuring its reach extends beyond the written word. Its availability in free PDF and audiobook versions further enhances its accessibility, allowing new generations to experience Hardy’s literary masterpiece and appreciate its enduring relevance in contemporary culture.

manual jack plate for jon boat

A manual jack plate enhances engine performance by adjusting the outboard motor’s height, improving fuel efficiency and control in shallow waters for Jon boats.

1.1 What is a Manual Jack Plate?

A manual jack plate is a device that allows for manual adjustment of an outboard motor’s height on a Jon boat. It provides precise control over the engine’s position, enhancing performance and fuel efficiency. Unlike hydraulic models, manual jack plates require physical adjustment, offering a cost-effective solution for optimizing motor height. Designed for durability, they are often constructed from robust materials like aircraft-quality aluminum, ensuring reliability in various water conditions. This simple yet effective system is ideal for boaters seeking improved control without the complexity of hydraulic systems.

1.2 Importance of Jack Plates in Jon Boat Performance

Jack plates are crucial for optimizing Jon boat performance, enabling precise control over the outboard motor’s height. This adjustment enhances fuel efficiency and reduces drag, especially in shallow waters. By raising the motor, boaters can minimize propeller cavitation and improve overall handling. The ability to fine-tune the motor’s position also boosts speed and stability, making jack plates an essential upgrade for anglers and recreational users seeking better performance and versatility in various water conditions.

Types of Jack Plates for Jon Boats

Manual and hydraulic jack plates are popular choices, with manual offering cost-effectiveness and hydraulic providing quick adjustments. Mini jack plates suit smaller engines up to 20HP.

2.1 Manual vs. Hydraulic Jack Plates

Manual jack plates are cost-effective and suitable for specific adjustments, while hydraulic models offer quick, convenient adjustments via console controls. Manual plates require physical effort but are reliable for consistent settings. Hydraulic plates provide versatility and ease, especially for frequent depth changes. Both options improve performance, but hydraulic plates are preferred for dynamic conditions, making them ideal for varied fishing or boating needs. The choice depends on the user’s preference for simplicity versus convenience.

2.2 Mini Jack Plates for Smaller Engines

Mini jack plates, like those from Vance Manufacturing, are designed for smaller engines (0-20 HP) and clamp-on motors. Built with aircraft-quality materials, they offer durability and precise height adjustments. These compact plates are ideal for smaller Jon boats, enhancing performance by optimizing engine position. They improve fuel efficiency and control in shallow waters, making them a practical choice for owners of small boats. While functional, they may lack the versatility of larger models, catering specifically to limited power needs.

Benefits of Installing a Manual Jack Plate

Installing a manual jack plate improves fuel efficiency and enhances control, especially in shallow waters, optimizing engine performance for Jon boats.

3.1 Improved Fuel Efficiency

Manual jack plates boost fuel efficiency by optimizing engine height, reducing drag, and enhancing propeller performance. This adjustment ensures the outboard motor operates efficiently, especially in shallow waters. By minimizing hull drag, the boat achieves better mileage, lowering fuel consumption. T-H Marine and Vance Manufacturing offer designs that help maximize efficiency, making them ideal for Jon boats. Proper engine placement reduces waste and ensures smooth operation, benefiting anglers and recreational users alike. Improved fuel efficiency is a key advantage of installing a manual jack plate.

3.2 Enhanced Control in Shallow Waters

Manual jack plates provide exceptional control in shallow waters by allowing precise engine height adjustments. This feature minimizes propeller drag and prevents damage from submerged obstacles. Enhanced control enables smoother navigation through tight spaces and improves maneuverability. Jon boat users benefit from better stability and responsiveness, making fishing and boating in shallow conditions more efficient. The ability to lift the motor higher reduces the risk of grounding, ensuring safer and more controlled operation in shallow environments.

Installation and Adjustment Tips

Ensure proper alignment and secure mounting of the jack plate. Adjust the height carefully to optimize engine performance and minimize drag in various water conditions.

4.1 Step-by-Step Installation Guide

Begin by preparing the transom and engine. Mount the jack plate securely, ensuring alignment with the engine’s mounting holes. Tighten all bolts firmly. Connect the adjustment mechanism according to the manufacturer’s instructions. Test the plate by raising and lowering the engine to confirm smooth operation. Finally, inspect all connections for stability and safety before use in the water.

4.2 Adjusting the Jack Plate for Optimal Performance

Begin by locating the adjustment mechanism on the manual jack plate. Raise or lower the plate in small increments, testing performance in different water conditions. Ensure the engine operates smoothly without ventilation or excessive drag. Avoid over-tightening bolts to maintain flexibility. Regularly test and adjust the plate to optimize fuel efficiency and control, especially in shallow waters. Proper alignment ensures the propeller runs efficiently, enhancing overall boat performance.

Maintenance and Troubleshooting

Regularly inspect and lubricate moving parts of the manual jack plate. Address any corrosion or wear promptly to ensure smooth operation and longevity of the system.

5.1 Common Issues and Solutions

Common issues with manual jack plates include corrosion, worn-out bolts, and stiffness in adjustment. Regular lubrication and inspection can prevent these problems. Replace any damaged parts promptly to maintain optimal performance. Ensuring all bolts are tightened properly and using protective coatings can help mitigate corrosion, especially in saltwater environments. Addressing these issues early ensures the jack plate continues to function smoothly and efficiently, providing consistent boat performance.

5.2 Regular Maintenance for Longevity

Regular maintenance is crucial for extending the life of a manual jack plate. Lubricate moving parts with marine-grade grease to prevent corrosion and ensure smooth operation. Inspect bolts and hardware for tightness and signs of wear. Apply protective coatings to metal components exposed to water. Clean the plate after use, especially in saltwater environments. Perform these checks seasonally or after heavy use to maintain optimal performance and durability. Proper care ensures your manual jack plate remains reliable for years of trouble-free operation.

Accessories for Manual Jack Plates

Essential accessories include mounting hardware, bolts, and additional components from brands like T-H Marine and Vance Manufacturing, ensuring secure installation and optimal performance for your Jon boat.

6.1 Mounting Hardware and Additional Components

Mounting hardware, including bolts and brackets, ensures a secure and stable installation of the jack plate. Additional components like spacers or shims may be required for customization. Durable materials, such as stainless steel or anodized aluminum, are often used for corrosion resistance. These accessories enhance the overall functionality of the jack plate, providing a solid foundation for optimal performance. Properly fitted hardware prevents engine misalignment and ensures smooth operation, making it essential for maintaining your Jon boat’s efficiency and handling in various water conditions.

Popular Manufacturers and Models

T-H Marine and Vance Manufacturing are leading providers of manual jack plates, offering high-quality solutions tailored for Jon boats and smaller engines.

7.1 T-H Marine Jack Plates

T-H Marine offers specialized jack plates designed for various boat types, including Jon boats. Their products provide superior adjustability and durability, enhancing engine performance and control. With a focus on quality, T-H Marine’s jack plates are engineered to withstand harsh marine conditions, ensuring reliability and longevity. Their accessories and setback solutions cater to specific boating needs, making them a preferred choice among enthusiasts seeking optimal performance.

7.2 Vance Manufacturing Mini Jack Plates

Vance Manufacturing specializes in mini jack plates, ideal for smaller engines up to 20HP. These compact, aircraft-quality solutions are perfect for Jon boats with clamp-on engines. Their durable construction ensures reliability in shallow waters and various conditions. Designed for simplicity and effectiveness, Vance’s mini jack plates provide efficient height adjustment, improving fuel efficiency and control. Their products are a great choice for anglers and small boat enthusiasts seeking affordable, high-performance solutions.

Manual jack plates are a practical upgrade for Jon boats, offering improved fuel efficiency and control, especially in shallow waters, making them a valuable addition for small engine setups.

8.1 Final Thoughts on Manual Jack Plates for Jon Boats

Manual jack plates are a cost-effective solution for enhancing Jon boat performance, offering improved fuel efficiency and precise control in shallow waters. With options like T-H Marine and Vance Manufacturing, boat owners can choose models tailored to their engine size and needs. These plates are easy to install and provide durability, making them a practical upgrade for anglers and recreational users. By optimizing engine height, manual jack plates ensure better handling and efficiency, making them a worthwhile investment for any Jon boat enthusiast.

ultrasound guided cortisone injection bulk bill

Ultrasound-guided cortisone injections are a minimally invasive procedure using ultrasound technology to accurately deliver corticosteroids into inflamed areas, providing effective pain relief while minimizing side effects.

What Are Ultrasound-Guided Cortisone Injections?

Ultrasound-guided cortisone injections are medical procedures where corticosteroids are precisely administered into inflamed areas using ultrasound imaging, ensuring accurate delivery to reduce inflammation and relieve pain effectively.

2.1 How the Procedure Works

The procedure begins with the patient positioned comfortably, and the affected area is cleaned. A fine needle is inserted under real-time ultrasound guidance, ensuring precise placement. Corticosteroids are then administered directly into the inflamed tissue, targeting the source of pain or inflammation; The ultrasound imaging allows the practitioner to visualize the injection site, enhancing accuracy and minimizing the risk of complications. This method is particularly effective for joints, tendons, and soft tissues, providing localized relief. The entire process is typically quick, with minimal discomfort, and patients can usually resume normal activities shortly after the injection. The use of ultrasound ensures that the corticosteroid is delivered exactly where needed, maximizing therapeutic benefits while reducing potential side effects.

2.2 Role of Ultrasound Technology

Ultrasound technology plays a pivotal role in guiding cortisone injections by providing real-time imaging of the target area. This ensures precise placement of the needle, reducing the risk of complications. The high-resolution images allow practitioners to visualize soft tissues, joints, and inflammation clearly, enabling accurate delivery of corticosteroids. Ultrasound guidance minimizes the likelihood of injecting medication into surrounding healthy tissues, which can lead to unnecessary side effects. It also enhances the effectiveness of the treatment by ensuring the corticosteroid reaches the exact source of inflammation. This advanced imaging technique is particularly beneficial for injections in small or difficult-to-reach areas, such as tendons or ligaments. By improving accuracy and safety, ultrasound technology has become an essential tool in modern medicine for administering cortisone injections effectively.

Conditions Treated by Cortisone Injections

Cortisone injections effectively treat inflammatory joint conditions like arthritis, tendinitis, and bursitis. They also address soft tissue injuries, reducing swelling and pain in areas such as tendons and ligaments.

3;1 Inflammatory Joint Conditions

Ultrasound-guided cortisone injections are highly effective in treating inflammatory joint conditions such as arthritis, tendinitis, and bursitis. These conditions often cause significant pain and swelling due to inflammation in the joints and surrounding tissues. Cortisone, a potent anti-inflammatory medication, is precisely delivered into the affected area using ultrasound imaging, ensuring accurate placement and maximizing therapeutic benefits. This procedure helps reduce joint inflammation, alleviate pain, and restore mobility. It is particularly beneficial for patients who do not respond adequately to oral medications or physical therapy. By targeting the source of inflammation directly, ultrasound-guided cortisone injections provide rapid and long-lasting relief, improving quality of life for individuals with chronic joint conditions.

3.2 Soft Tissue Injuries

Ultrasound-guided cortisone injections are also effective in managing soft tissue injuries, such as tendinitis, bursitis, and ligament sprains. These injuries often result from overuse, trauma, or repetitive strain, leading to inflammation and pain in muscles, tendons, and ligaments. Cortisone injections deliver anti-inflammatory medication directly to the affected area, reducing swelling and promoting healing. Ultrasound guidance ensures precise placement of the corticosteroid, minimizing the risk of complications and enhancing the treatment’s effectiveness. This method is particularly beneficial for injuries that are difficult to access or diagnose, as ultrasound provides clear visualization of the damaged tissue. By targeting the root cause of inflammation, ultrasound-guided injections offer significant pain relief and accelerated recovery for individuals with soft tissue injuries, helping them return to normal activities sooner.

The Procedure for Ultrasound-Guided Injections

The procedure for ultrasound-guided cortisone injections begins with preparing the patient and cleansing the injection site to minimize infection risks. The patient is positioned to optimize access to the target area, and ultrasound imaging is used to visualize the affected tissue in real time. A fine needle is then inserted under ultrasound guidance, ensuring precise placement of the corticosteroid medication into the inflamed joint or soft tissue. The process is minimally invasive and typically painless, as local anesthesia may be used to numb the area. Once the injection is complete, the needle is withdrawn, and the site is covered with a sterile dressing. Patients are usually monitored briefly before being discharged with instructions for post-injection care. This method ensures accuracy and safety, making it a highly effective treatment option for various musculoskeletal conditions.

Benefits of Ultrasound Guidance

Ultrasound guidance offers several advantages in cortisone injections, primarily enhancing accuracy and safety. It allows real-time visualization of the needle placement, ensuring the medication is delivered precisely to the inflamed tissue, joint, or tendon. This reduces the risk of hitting nearby nerves or blood vessels, minimizing potential complications. Compared to blind injections, ultrasound-guided injections are more effective, as they target the exact source of inflammation. Additionally, ultrasound guidance eliminates the need for radiation, making it a safer option for patients. The procedure also reduces discomfort, as the needle is directed accurately, avoiding unnecessary tissue trauma. Overall, ultrasound-guided cortisone injections provide improved outcomes, faster recovery, and greater patient satisfaction compared to traditional methods.

Understanding Bulk Bill and Medicare Coverage

Bulk billing and Medicare coverage play a significant role in making ultrasound-guided cortisone injections more accessible and affordable for patients. Under Medicare, certain ultrasound-guided injection procedures are eligible for reimbursement, reducing out-of-pocket costs for patients. Bulk billing allows healthcare providers to directly bill Medicare, ensuring patients incur no additional fees for the procedure. However, coverage may vary depending on the specific condition being treated and the clinic offering the service. Patients are advised to consult with their healthcare provider to confirm eligibility and understand any potential out-of-pocket expenses. This streamlined billing process ensures that patients can benefit from advanced treatments like ultrasound-guided cortisone injections without financial barriers, promoting timely and effective care.

Preparation and Aftercare

Proper preparation and aftercare are essential to ensure the success and safety of ultrasound-guided cortisone injections. Patients are typically advised to avoid eating or drinking for a few hours before the procedure, though specific instructions may vary. It’s important to avoid blood-thinning medications, such as aspirin or ibuprofen, for a few days prior to the injection to minimize bleeding risks. Comfortable clothing should be worn to allow easy access to the treatment area. After the procedure, patients should rest the injected area for 24-48 hours, avoiding strenuous activities. Mild side effects, such as temporary pain or swelling, can be managed with ice packs. Patients are encouraged to monitor for any unusual symptoms and schedule a follow-up appointment to assess the treatment’s effectiveness and address any concerns.

Effectiveness and Success Rates

Ultrasound-guided cortisone injections have proven to be highly effective in treating various inflammatory and painful conditions, with success rates varying depending on the underlying condition. Studies suggest that approximately 70-80% of patients experience significant pain relief and improved function, particularly for conditions like osteoarthritis, tendinitis, and bursitis. The precision of ultrasound guidance enhances the accuracy of the injection, leading to better outcomes compared to traditional methods. Pain relief typically begins within a few days and can last for several months to a year or more. Factors influencing success include the severity of the condition, the accuracy of the injection, and individual patient responses. While some patients may require multiple injections, the procedure is widely regarded as a safe and effective treatment option for managing chronic pain and inflammation.

Risks and Potential Side Effects

While ultrasound-guided cortisone injections are generally safe, there are potential risks and side effects to be aware of. Common side effects include temporary pain or swelling at the injection site, as well as possible skin discoloration or thinning in the treated area. In rare cases, more serious complications can occur, such as infection, nerve damage, or tendon weakening. Additionally, corticosteroids can have systemic effects, including temporary hormonal changes or elevated blood sugar levels in diabetic patients; These risks are minimized when the procedure is performed by an experienced practitioner using ultrasound guidance. Patients should discuss their medical history and any concerns with their healthcare provider to ensure safe treatment. Overall, the benefits of the procedure often outweigh the risks for most individuals seeking pain relief.

Ultrasound-guided cortisone injections offer a precise and effective treatment option for managing inflammation and pain in joints and soft tissues. By leveraging advanced ultrasound technology, these injections ensure accurate delivery of corticosteroids, minimizing potential side effects. The Bulk Bill option under Medicare makes this procedure more accessible and affordable for patients in Australia. While the treatment carries some risks, such as temporary pain or infection, the benefits often outweigh these concerns for individuals seeking relief from chronic conditions. Consulting with a qualified healthcare provider is essential to determine if this treatment aligns with your specific needs. Overall, ultrasound-guided cortisone injections provide a reliable solution for those looking to alleviate pain and restore mobility, supported by both medical expertise and cost-effective coverage.

welt pocket tutorial

A welt pocket is a sleek, slit-style pocket finished with a fabric band, commonly used in tailored garments like jackets and trousers. Its clean design enhances both functionality and aesthetics, making it a popular choice for sewists aiming to add a professional touch to their creations.

1.1 What is a Welt Pocket?

A welt pocket is a type of slit pocket finished with a fabric band, or welt, that covers the opening. It is commonly used in tailored garments like jackets, trousers, and skirts. The welt pocket consists of a rectangular opening in the fabric, reinforced with a separate strip of fabric, creating a clean, professional appearance; Unlike other pockets, the welt pocket is designed to be inconspicuous, blending seamlessly into the garment while providing functional storage. Its construction involves sewing the welt to the garment and attaching a pocket bag underneath, making it both durable and elegant. This technique is popular for its timeless appeal and versatility in various sewing projects.

1.2 Importance of Welt Pockets in Garment Sewing

Welt pockets are a cornerstone of professional garment sewing, offering a sleek, polished finish that enhances both functionality and aesthetics. Unlike bulkier pocket styles, welt pockets lie flat against the fabric, making them ideal for tailored garments like jackets, trousers, and skirts. Their streamlined design ensures minimal visible stitching, creating a clean, sophisticated look. Additionally, welt pockets are durable and long-lasting, withstanding frequent use without fraying or weakening. For sewists, mastering the welt pocket technique is essential for achieving professional results and adding value to handmade garments. It’s a skill that elevates projects, making them look store-bought while providing practical storage solutions.

Tools and Materials Needed for Sewing a Welt Pocket

Essential tools include a sewing machine, sharp scissors, pins, and a seam ripper. Materials required are fabric for the welt and pocket bag, stabilizer for support, and matching thread.

2.1 Essential Sewing Tools

To sew a welt pocket, you’ll need a few key tools; A sewing machine is essential for precise stitching, while sharp scissors or rotary cutters ensure clean fabric cuts. Pins will help align the welt and pocket bag accurately. A seam ripper is handy for correcting mistakes. Additionally, a ruler or measuring tape is necessary for marking straight lines, and an iron is crucial for pressing seams flat. Some sewists also use stabilizer or interfacing to add structure to the welt. These tools collectively ensure a professional finish and make the sewing process more efficient and accurate.

2.2 Fabric Requirements for the Welt and Pocket Bag

Choosing the right fabric is crucial for a professional-looking welt pocket. The welt itself should be made from a sturdy fabric, such as cotton or wool, to provide structure and stability. The pocket bag, hidden inside the garment, can be crafted from lighter-weight fabrics like cotton lawn or lining material. For a cohesive appearance, the welt fabric should match or complement the main garment fabric. If desired, contrasting fabric can be used for a decorative touch. Ensure fabrics are pre-washed to prevent shrinkage and pressed before cutting to achieve crisp, clean results. Proper fabric selection ensures durability and a polished finish for the welt pocket.

Step-by-Step Guide to Sewing a Welt Pocket

Sewing a welt pocket involves cutting the welt and pocket bag, attaching the welt to the garment, and sewing the pocket bag for a professional finish using precise techniques and quality materials.

3.1 Cutting the Welt and Pocket Bag

Cutting the welt and pocket bag accurately is crucial for a professional-looking welt pocket. Measure and cut the welt fabric to the desired length and width, ensuring it matches your garment’s pocket opening. For the pocket bag, cut a slightly larger piece to allow for seam allowances. Use a ruler or pattern to achieve straight, precise cuts. Ensure the fabric is aligned properly, and consider using a rotary cutter for accuracy. If using a pattern, trace and cut carefully. Remember, the welt should be slightly shorter than the pocket opening for a neat finish. Press the cuts to maintain shape before sewing.

3.2 Attaching the Welt to the Garment

Attach the welt to the garment by aligning its edges with the pocket opening. Pin the welt in place, ensuring it is centered and evenly spaced. Sew along the length of the welt using a straight stitch, starting and stopping at the ends of the pocket opening. Fold the seam allowances under and press to create a crisp fold. This step securely anchors the welt to the garment, forming the foundation of the pocket. Use a matching thread color to blend with the fabric for a professional finish. Ensure the welt lies flat and even before proceeding to sew the pocket bag.

3.3 Sewing the Pocket Bag

Once the welt is attached, place the pocket bag under the welt, aligning raw edges. Pin the pocket bag in place, ensuring it is centered and evenly spaced. Sew along the sides and bottom of the pocket bag using a straight stitch, leaving a small opening for turning. Carefully trim excess fabric from the seams, then turn the pocket bag right side out. Press the seams to create a crisp edge. Fold the opening under and press, then topstitch along the pocket edges for a professional finish. Ensure the pocket bag is securely attached and lies flat beneath the welt for a polished look.

Advanced Techniques for Welt Pockets

Explore advanced methods like double welt pockets and decorative flaps or zippers to enhance functionality and style, offering a professional finish to your tailored garments.

4.1 Sewing a Double Welt Pocket

A double welt pocket adds elegance and functionality, featuring two welt strips. Begin by cutting two welt pieces and two pocket bags. Place the first welt on the garment, aligning edges. Sew in place, then attach the second welt symmetrically. Fold and press both welts inward, creating a channel. Sew the pocket bags to each welt, ensuring they align perfectly. Turn the bags right side out and sew the sides together. Attach the completed pocket to the garment, ensuring even stitching. This technique offers a sophisticated look, ideal for high-end tailoring projects and professional finishes;

4.2 Adding Decorative Flaps or Zippers

Enhance functionality and aesthetics by adding decorative flaps or zippers to your welt pockets. For flaps, cut a small fabric piece, add interfacing for stability, and sew it to the garment above the pocket opening. Topstitch for a polished look. For zippers, shorten one to fit the pocket slit, place it under the welt, and sew carefully to secure. Ensure the zipper aligns with the welt edges for a seamless appearance. These decorative elements add a professional touch and personal style to your welt pockets, making them stand out in tailored garments like jackets or trousers.

Common Mistakes and Troubleshooting

Common errors include misaligned welt edges and uneven stitches. To fix, ensure accurate cutting, use a seam guide, and press thoroughly. Precision and patience yield professional results.

5.1 Avoiding Uneven Stitches

Uneven stitches can ruin the professional look of a welt pocket. To prevent this, maintain consistent tension while sewing, use a walking foot if available, and backstitch at the beginning and end of seams. Pressing the welt before sewing ensures crisp folds, leading to straighter stitches. Additionally, marking the fabric accurately with chalk or a ruler helps guide the needle, reducing the likelihood of deviations. Regularly checking your stitch length and alignment as you sew can also help catch and correct issues early, ensuring a polished finish for your welt pocket.

5.2 Fixing Misaligned Welt Edges

Misaligned welt edges can disrupt the pocket’s professionalism. Start by carefully identifying where the edges are uneven. Gently pull the fabric taut and realign the welt, ensuring the edges are flush. Pin or clip the corrected position securely. If necessary, press the area to flatten any wrinkles. Sew slowly, maintaining steady tension to avoid further misalignment. Regularly inspect your work as you go to catch and correct any issues early. This attention to detail will ensure a smooth, professional finish for your welt pocket.

Mastering welt pockets enhances your sewing skills and elevates garment professionalism. Practice consistently, and don’t hesitate to experiment with advanced techniques for stunning, polished results every time.

6.1 Best Practices for Professional Results

To achieve professional results when sewing welt pockets, focus on precision and attention to detail. Use sharp tools and high-quality fabric to ensure clean cuts and smooth stitching. Always press seams as you go to maintain a crisp finish. Align welt edges carefully to avoid misplacement, and use a walking foot or Teflon foot for even feeding. Double-check measurements before cutting to prevent errors. For a polished look, topstitch the welt and pocket opening. Practice on scrap fabric to refine techniques, and consider hand-basting for intricate alignment. By combining patience with these practices, you’ll create welt pockets that look professionally tailored and enduringly durable.

6.2 Encouragement for Beginners

Mastering welt pockets may seem daunting at first, but with patience and practice, anyone can achieve professional results. Start with simple projects to build confidence, and don’t hesitate to use online tutorials for guidance. Remember, even experienced sewists began with their first welt pocket. Embrace mistakes as learning opportunities and celebrate small victories along the way. Each attempt brings you closer to perfection. Stay motivated, and soon you’ll be creating sleek, functional pockets with ease. Sewing is a skill that grows with time, so enjoy the journey and take pride in your creations!

akta pure manual

Welcome to the AKTA pure manual, your comprehensive guide to mastering the AKTA pure system. This manual is designed to help you understand and operate the system effectively, ensuring optimal performance in downstream processing tasks. Whether you’re a new user or an experienced operator, this guide provides essential insights and practical instructions to maximize your workflow efficiency.

1.1 Overview of the AKTA pure System

The AKTA pure system is a cutting-edge chromatography solution designed for efficient downstream processing. It offers a user-friendly interface, advanced automation, and precise control over purification processes. Ideal for research and industrial applications, the system supports various chromatography techniques, ensuring high-quality results. Its modular design and scalability make it suitable for both small-scale experiments and large-scale production, catering to diverse laboratory needs.

1.2 Importance of the Manual for Effective Operation

The AKTA pure manual is crucial for safe and effective system operation. It provides detailed instructions, safety guidelines, and troubleshooting tips, ensuring users can handle the system confidently. By following the manual, operators can avoid errors, maintain compliance with regulations, and optimize performance. It serves as an essential resource for both novice and experienced users, fostering proficiency and consistency in downstream processing tasks.

Prerequisites for Operating the AKTA pure System

Operating the AKTA pure system requires a solid foundation in downstream processing and essential technical skills. Understanding these prerequisites ensures safe and effective system operation.

2.1 General Understanding of Downstream Processing

A general understanding of downstream processing is crucial for operating the AKTA pure system effectively. This includes knowledge of purification steps like clarification, chromatography, and polishing. Familiarity with techniques such as filtration and buffer preparation is also essential. Understanding these processes ensures efficient and successful execution of downstream operations using the AKTA pure system.

2.2 Essential Skills and Knowledge for Users

Users should possess a solid foundation in chromatography and downstream processing principles. Proficiency in operating automated systems and interpreting data is vital. Familiarity with laboratory safety protocols and attention to detail are also critical. Understanding system components and troubleshooting basics ensures effective operation and maintenance of the AKTA pure system for optimal performance in various applications.

System Operation and Navigation

Understanding the AKTA pure system begins with familiarizing yourself with its components and user interface. Hands-on exercises and clear instructions guide you through operation and navigation seamlessly.

3.1 Basic Components and Functions of the AKTA pure

The AKTA pure system comprises key components such as pumps, detectors, and fraction collectors, each designed for precise control over chromatography processes. The user-friendly interface simplifies monitoring and adjusting parameters, ensuring seamless operation. Understanding these elements is crucial for optimizing downstream processing tasks and achieving consistent results in various laboratory applications.

3.2 Navigating the User Interface

The AKTA pure user interface is designed for intuitive navigation, featuring clear menus and controls. Users can easily monitor and adjust chromatography parameters, access pre-set methods, and review real-time data. The interface supports customization, allowing users to tailor workflows to specific needs. Alarms and notifications ensure proactive monitoring, while the touchscreen functionality enhances ease of operation and efficiency in laboratory settings.

Troubleshooting and Maintenance

Regular system checks and proactive maintenance ensure optimal performance. Addressing common issues promptly prevents downtime, while scheduled servicing guarantees reliability and extends the lifespan of the AKTA pure system.

4.1 Common Issues and Solutions

Common issues with the AKTA pure system include sensor malfunctions, flow rate inconsistencies, and software glitches. Regular calibration and updating software can resolve these problems. Ensure all connections are secure, and refer to the troubleshooting guide for step-by-step solutions. Addressing these issues promptly ensures smooth operation and maintains the system’s efficiency and accuracy in downstream processing applications.

4.2 Regular Maintenance for Optimal Performance

Regular maintenance is crucial for the AKTA pure system’s optimal performance. This includes cleaning the system components, checking and replacing filters, and ensuring all tubing and connections are secure. Additionally, updating the software and performing calibration tasks as recommended can prevent operational issues. Scheduled maintenance ensures longevity, accuracy, and reliability in downstream processing applications, minimizing downtime and enhancing overall productivity.

Compliance and Safety Guidelines

Adherence to regulatory standards and safety protocols is essential for operating the AKTA pure system. Ensure compliance with guidelines to protect users, equipment, and processes effectively.

5.1 Regulatory Compliance in Operation

Operating the AKTA pure system requires strict adherence to regulatory standards to ensure compliance with industry laws and safety protocols. Users must familiarize themselves with local and international regulations, maintaining accurate documentation and following validated procedures. Compliance ensures the integrity of processes, preventing legal issues and guaranteeing the quality of downstream processing outcomes.

5.2 Safety Precautions for Handling the System

When operating the AKTA pure system, always wear protective gear, including gloves and lab coats, to minimize exposure to chemicals. Ensure the workspace is well-ventilated and free from flammable materials. Avoid touching electrical components with wet hands and never modify the system without authorization. Regularly inspect tubing and connections for leaks or damage. Follow proper shutdown procedures to prevent accidents and ensure system longevity.

Training and Resources

Access comprehensive training materials, including user manuals, online courses, and video tutorials, to enhance your proficiency with the AKTA pure system. Utilize downloadable guides and troubleshooting tips for optimal performance. Additionally, explore community forums and technical support resources for personalized assistance and continuous learning opportunities;

6.1 Available Training Materials and Programs

Explore a range of training materials designed to enhance your AKTA pure expertise. From detailed user manuals to interactive online courses and video tutorials, these resources cover system operation, troubleshooting, and advanced features. Additionally, downloadable guides and troubleshooting tips are available to ensure optimal performance and streamline your workflow. Utilize these tools to improve efficiency and master downstream processing techniques effectively.

6.2 Online Resources for Further Learning

Supplement your knowledge with online resources tailored for AKTA pure users. Access tutorials, forums, and technical documentation to deepen your understanding. Explore the AKTA pure 25 Quick Start Guide and troubleshooting sections for practical insights. These resources offer advanced techniques, system optimization tips, and real-world applications, ensuring you stay updated and proficient in operating the AKTA pure system effectively.

Advanced Features and Customization

Discover tailored solutions with AKTA pure’s advanced features, enabling precise control over chromatography processes. Customize workflows, optimize performance, and integrate with complementary systems for enhanced productivity and flexibility in downstream processing.

7.1 Utilizing Advanced Settings for Specific Processes

Explore the AKTA pure system’s advanced settings to tailor processes for specific applications. Adjust parameters like flow rates, pressure limits, and detection methods to optimize performance. Customize chromatography conditions, such as gradient profiles and buffer sequences, to meet the unique demands of your workflow. Utilize these settings to enhance separation efficiency, yield, and purity. Leverage the system’s flexibility to achieve precise control over your downstream processing tasks.

7.2 Customizing the System for Unique Applications

The AKTA pure system offers extensive customization options to adapt to specific downstream processing needs. Users can modify chromatography methods, create custom protocols, and integrate additional hardware or software for tailored workflows. By leveraging the system’s programmable parameters and flexible design, you can optimize performance for unique applications, ensuring precise control and enhanced results in various industrial and laboratory settings.

Case Studies and Applications

Explore real-world applications of the AKTA pure system across various industries, showcasing its versatility in downstream processing. Discover success stories highlighting its efficiency and adaptability in laboratory settings.

8.1 Real-World Applications of the AKTA pure System

The AKTA pure system is widely used in biopharmaceutical manufacturing, academic research, and industrial processes. It excels in protein purification, chromatography, and downstream processing. Laboratories leverage its precision for vaccine production, antibody purification, and scale-up processes. Its versatility and efficiency make it a cornerstone in modern biotechnology, ensuring consistent results across diverse applications and industries.

8.2 Success Stories from Various Industries

Industries worldwide have embraced the AKTA pure system, achieving remarkable results. Biopharma companies report accelerated vaccine production and consistent antibody purification. Research institutions highlight improved protein yield and purity. Manufacturing sectors praise its scalability and reliability. These success stories underscore the AKTA pure’s versatility and its role in advancing biotechnology and industrial processes, driving innovation across the globe with precision and efficiency.

Future Trends and Upgrades

The AKTA pure system is expected to integrate emerging technologies like AI-driven automation and enhanced connectivity. Future upgrades will focus on sustainability and user-centric designs, ensuring cutting-edge performance.

9.1 Emerging Technologies in Downstream Processing

Emerging technologies like AI and machine learning are revolutionizing downstream processing by enhancing automation and process optimization. The AKTA pure system is expected to leverage these advancements to improve monitoring, scalability, and efficiency. Integrating IoT and cloud-based solutions will further enable real-time data analysis and remote system control, ensuring the AKTA pure remains at the forefront of bioprocessing innovation;

9.2 Upcoming Features and Enhancements

Future updates to the AKTA pure system will include enhanced user interface designs for improved navigation and a more intuitive user experience. New features such as advanced process monitoring and real-time data analytics are expected to be integrated, allowing for smarter decision-making. Additionally, upcoming enhancements will focus on energy efficiency and sustainability, ensuring the system remains aligned with modern laboratory and industrial standards.

Mastery of the AKTA pure manual ensures efficient operation and optimal results. Continuous learning and adaptation to new features will enhance your expertise and future applications.

10.1 Summary of Key Points

The AKTA pure manual provides a detailed guide to understanding and operating the system, emphasizing its role in downstream processing. Key points include system components, troubleshooting, and compliance. Effective operation requires a foundational knowledge of chromatography and maintenance practices. Users are encouraged to leverage training resources and stay updated on emerging technologies to enhance their proficiency and adapt to future advancements in the field.

10.2 Encouragement for Continuous Learning and Improvement

Continuous learning is crucial for mastering the AKTA pure system. Engage with training materials, online resources, and updates to stay proficient. Regularly review new features and best practices to enhance your skills. Embrace a growth mindset to optimize system performance and adapt to evolving downstream processing demands, ensuring long-term success and efficiency in your work.