swindon – highworth bus 7 timetable pdf
Overview of Swindon ⎼ Highworth Bus 7 Timetable PDF
The Swindon-Highworth Bus 7 Timetable PDF is an essential resource for planning journeys between these towns, detailing route stops, service frequency, and scheduling, available for easy download.
Importance of the Bus 7 Service
The Bus 7 service is a vital transport link between Swindon and Highworth, providing frequent and reliable connections for commuters and residents. It operates seven days a week, ensuring accessibility for work, education, and leisure. The route covers key stops, including Swindon Bus Station and Highworth Swindon Street, making it a lifeline for those without alternative transport. Its regular schedule, with services running from early morning to late evening, caters to diverse travel needs. Additionally, the service supports local businesses and communities by facilitating easy travel between these towns. The Bus 7 is also integrated with other transport networks, offering seamless connections for onward journeys. Its consistency and coverage make it an indispensable part of the region’s public transport system.
Route Structure and Key Stops
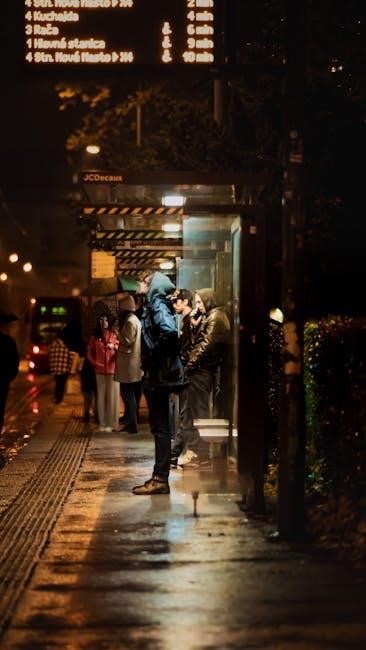
The Bus 7 service operates between Swindon and Highworth, connecting key locations in both towns. The route begins at Swindon Bus Station and ends at Highworth Swindon Street, covering essential stops such as Greenbridge Retail Park, Freshbrook, and other local hubs. This service is designed to provide convenient access to residential areas, shopping centers, and employment zones. The route structure ensures that passengers can easily travel between Swindon and Highworth, with regular stops spaced throughout the journey. Key stops include Swindon Town Centre, which offers connections to other transport links, and Highworth Swindon Street, a central point for local amenities. The service runs frequently, with buses operating every 30 minutes on weekdays and hourly on weekends, making it a reliable option for daily commutes.

Timetable Details
The Bus 7 timetable operates seven days a week, with frequent departures from Swindon to Highworth. Weekday services run from 5:00 AM to 11:35 PM, while weekends have reduced hours.
Weekday Timetable
The Swindon-Highworth Bus 7 operates from 5:00 AM to 11:35 PM on weekdays, providing frequent services for commuters. Peak hours, typically between 7:00 AM and 7:00 PM, see buses running every 30 minutes to accommodate high demand. Off-peak times offer slightly reduced frequency, with buses arriving every 45 minutes. Key stops include Swindon Bus Station, Greenbridge Retail Park, and Highworth Swindon Street. The first bus from Highworth departs at 5:28 AM, while the first from Swindon leaves at 5:30 AM. Regular services ensure reliable travel options throughout the day, with the last bus departing at 11:35 PM. This schedule is consistent Monday to Friday, catering to both early risers and late commuters.
Weekend and Holiday Timetable
The Swindon-Highworth Bus 7 operates on a reduced schedule during weekends and holidays. On Saturdays, buses run from 5:30 AM to 11:35 PM, with services every 45 minutes during off-peak hours and more frequently during peak times. Sundays follow a similar pattern, with the first bus departing at 7:45 AM and the last at 6:15 PM. Holiday schedules mirror weekends, ensuring consistent service availability. Key stops remain the same, including Swindon Bus Station and Highworth Swindon Street. Passengers should note that the last bus on weekends and holidays departs earlier than on weekdays, with final services concluding by 6:15 PM on Sundays. This adjusted timetable accommodates lighter weekend demand while maintaining essential connectivity between Swindon and Highworth.
Special Timetable Exceptions
The Swindon-Highworth Bus 7 service occasionally faces disruptions due to unforeseen events. For instance, a recent incident involving a bus catching fire on the A361 caused temporary service suspensions. Additionally, scheduled engineering works or road closures, such as the A361 closure between Highworth and Supermarine, may alter timetables. Passengers should note that services may terminate earlier than usual during such events. On weekends and holidays, the last bus departs earlier, with no journeys after 6:15 PM on Sundays. The operator provides real-time alerts and updates on their website or mobile app to help passengers plan accordingly. Staying informed through these channels is crucial to avoid inconvenience during special timetable exceptions.

Accessing the Timetable PDF
The Swindon-Highworth Bus 7 Timetable PDF is available for free download from the official Stagecoach website, ensuring easy access to essential journey planning information anytime.
Downloading the PDF from Official Sources
Downloading the Swindon-Highworth Bus 7 Timetable PDF is straightforward. Visit the Stagecoach website, navigate to the Timetables section, and select the Bus 7 route. Click on the provided PDF link to download the document, which includes detailed schedules, route maps, and key stops. Ensure you have a PDF viewer installed to access the file. Regularly check for updates, as timetables may change due to service adjustments or special events. This official source guarantees the most accurate and up-to-date information for planning your journey efficiently.
Understanding the PDF Format and Layout
The Swindon-Highworth Bus 7 Timetable PDF is designed for easy navigation, featuring a clear and organized layout. The document includes a table format with columns for departure times from key stops such as Swindon Bus Station and Highworth Swindon Street. Each page typically focuses on specific days, such as weekdays or weekends, with time points highlighted for quick reference. A route map is often included to visually represent the journey, while notes at the bottom provide essential information like service updates or special instructions. The PDF is structured chronologically, making it simple to track bus arrivals and plan trips accordingly. This format ensures users can quickly locate their desired stop and corresponding timetable.

Service Disruptions and Updates
The No. 7 bus service experienced disruptions due to a bus fire on the A361, causing cancellations. Passengers are advised to check for real-time updates or alternative routes.
Scheduled Engineering Works and Changes
Scheduled Engineering Works and Changes
Scheduled engineering works on the A361 have caused disruptions to the Swindon-Highworth Bus 7 service. A recent bus fire incident led to route closures, prompting service cancellations. Stagecoach has implemented minor route changes for services 7, 9, and 10, effective from Sunday, May 28. Passengers are advised to check updated timetables for adjustments. Engineering works may result in temporary detours or stop closures. Additionally, the service operates on a reduced schedule during weekends and holidays, with no journeys after 6pm except for the 6pm Swindon to Highworth route. For the latest updates, passengers should refer to official sources or real-time alerts. Engineering works and service changes are regularly updated to ensure reliable travel.
Real-Time Alerts and Service Notifications
Real-time alerts and service notifications are crucial for staying informed about disruptions to the Swindon-Highworth Bus 7 service. The A361 closure due to a bus fire and subsequent service cancellations highlight the need for prompt updates. Passengers can access real-time information via official transport apps, social media, or the Stagecoach website. Notifications include details on delayed or canceled services, alternative routes, and temporary timetable adjustments. Additionally, passengers can sign up for email alerts or use journey planners to receive personalized updates. Real-time tracking of buses through apps ensures passengers can plan their journeys accurately. Regular service notifications also inform users about engineering works, road closures, or unexpected disruptions. Staying connected through these channels helps minimize travel inconvenience and ensures passengers are always well-informed.

Additional Resources
For further assistance, passengers can access route maps, journey planners, and customer support through the Swindon Bus Company website or by contacting their helpline for detailed inquiries.
Links to Route Maps and Journey Planners
Passengers can access detailed route maps and journey planners for the Swindon-Highworth Bus 7 service through the official Swindon Bus Company website or via their mobile app. These resources provide interactive maps, allowing users to visualize the route, identify stops, and plan their trips efficiently. Additionally, the journey planner tool enables travelers to input their start and end points for customized timetables and real-time updates. For convenience, downloadable PDF versions of the route map and timetable are also available. These tools ensure that passengers can navigate the service seamlessly and stay informed about any schedule changes or disruptions. Visit the Swindon Bus Company website or contact their customer support for direct links to these resources.
Customer Support and Feedback Options
The Swindon Bus Company offers comprehensive customer support to assist passengers with inquiries about the Bus 7 service. Travelers can contact the support team via phone at 0871 200 2233, available from 7:00 AM to 10:00 PM, seven days a week. Additionally, the company’s official website provides a contact form for submitting feedback or questions. Passengers can also share their experiences and suggestions directly through the website. For real-time updates and service alerts, the Swindon Bus Company encourages passengers to follow their social media channels. This ensures that users receive timely information and can plan their journeys accordingly. Feedback is valued and used to improve the overall service quality and passenger experience.