safety first grow and go manual pdf
Safety First Grow and Go Manual PDF: A Comprehensive Guide
This manual delivers crucial regulatory and enforcement details, hazard controls, and best practices for employers and workers, fostering a safer, more productive environment.
Understanding the “Safety First Grow and Go” Manual
The “Safety First Grow and Go” manual serves as a foundational resource for establishing and maintaining robust workplace safety protocols. It’s designed to equip both employers and employees with the knowledge necessary to identify, assess, and control potential hazards.
This comprehensive guide details OSHA regulations, enforcement procedures, and proven best practices. Crucially, it emphasizes the importance of education and training, recognizing these as vital tools for informing personnel about workplace risks and effective preventative measures.
The manual aims to boost both safety and overall productivity within the organization, offering a pathway to a healthier and more secure work environment for everyone involved.
The Importance of Workplace Safety Training
Workplace safety training is paramount for fostering a culture of prevention and minimizing risks. Effective training, as highlighted in resources like the “Safety First Grow and Go” manual, informs workers and managers about potential hazards and the appropriate control measures.
This education isn’t merely about compliance; it’s about empowering individuals to proactively identify unsafe conditions and respond effectively. Utilizing platforms like YouTube can supplement traditional training with visual aids and demonstrations, enhancing comprehension and retention.
Ultimately, well-trained employees are more productive and contribute to a safer, more efficient work environment.
OSHA’s Role in Workplace Safety
The Occupational Safety and Health Administration (OSHA) plays a vital role in ensuring safe and healthful working conditions. OSHA provides regulatory and enforcement information, crucial for programs like the “Safety First Grow and Go” initiative. Their Safety and Health Topics pages offer guidance on hazard identification, control methods, and best practices.
OSHA’s influence extends to promoting education and training, recognizing these as essential tools for informing both workers and management about workplace risks. This proactive approach aims to reduce accidents, injuries, and fatalities, fostering a safer national workforce.
Key Components of a Safety and Health Program
Effective safety and health programs are foundational to workplace wellbeing, encompassing elements like hazard prevention and control. Existing programs – including lockout/tagout, confined space protocols, and process safety management – are critical components; Worker input, gathered through surveys and safety meeting minutes, is also essential for program refinement.
These programs aim to protect employees from hazards, minimize incidents, and cultivate a proactive safety culture. Implementing preventative measures, alongside robust training, ensures a consistently safe and productive work environment, aligning with initiatives like “Safety First Grow and Go.”

Hazard Identification and Control
This section details recognizing workplace dangers and implementing effective controls, crucial for preventing injuries, illnesses, and incidents, as outlined in safety programs.
Common Workplace Hazards
Identifying prevalent dangers is paramount for proactive safety measures. These routinely encompass slips, trips, and falls due to environmental factors, alongside machinery-related risks demanding strict lockout/tagout adherence. Confined spaces present unique atmospheric and physical hazards, necessitating specialized entry protocols.
Furthermore, exposure to hazardous substances – like butadiene and cadmium – requires diligent control. Ergonomic stressors, electrical dangers, and fire hazards also pose significant threats. A comprehensive hazard assessment, regularly updated, forms the bedrock of a robust safety program, minimizing potential incidents and safeguarding worker well-being. Prioritizing hazard recognition is essential.
Lockout/Tagout Procedures
Lockout/Tagout (LOTO) is critical for controlling hazardous energy during servicing and maintenance of equipment. These procedures involve completely isolating energy sources – electrical, mechanical, pneumatic, hydraulic, and thermal – and applying locks and tags to prevent accidental energization.
Proper LOTO prevents unexpected equipment startup, releasing stored energy, and subsequent injuries. Detailed, written procedures, employee training, and periodic inspections are vital components. Effective LOTO programs are foundational elements within comprehensive safety and health programs, ensuring worker protection and preventing catastrophic events during maintenance activities.
Confined Space Entry Protocols
Confined spaces – areas with limited entry/exit and potential hazards – demand strict entry protocols. These protocols begin with hazard identification, atmospheric testing (oxygen levels, flammability, toxicity), and continuous monitoring during occupancy.
A permit-required confined space program necessitates trained entrants, attendants monitoring from outside, and rescue personnel readily available. Proper ventilation, isolation of hazards, and appropriate personal protective equipment (PPE) are essential. Following established procedures minimizes risks associated with hazardous atmospheres and physical dangers within these restricted areas, safeguarding worker well-being.
Process Safety Management (PSM)
Process Safety Management (PSM) is crucial for preventing or minimizing the consequences of catastrophic releases of highly hazardous chemicals. Existing programs, like those detailed in the “Safety First Grow and Go” manual, emphasize a systematic approach.
This includes hazard analysis, operating procedures, training, mechanical integrity, pre-startup safety reviews, and emergency planning. PSM aims to control hazards associated with processes using these chemicals, protecting employees, the public, and the environment. Consistent implementation and worker involvement are vital for effective PSM programs.

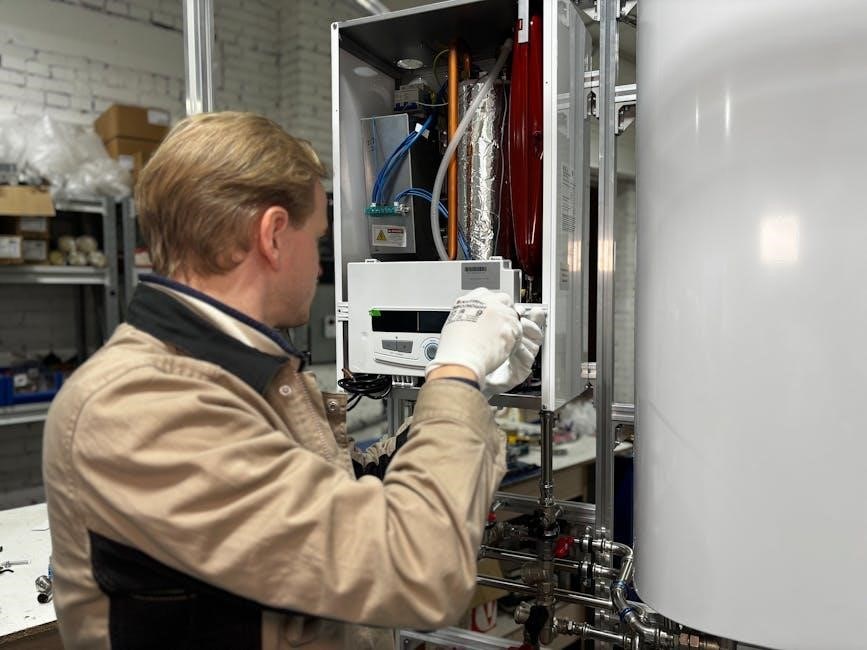
Personal Protective Equipment (PPE)

PPE, a key component of safety programs, requires proper selection, usage, and maintenance to effectively protect workers from workplace hazards and injuries.
Types of PPE and Their Applications
Personal Protective Equipment (PPE) encompasses a wide range of protective gear designed to minimize exposure to hazards. Common types include eye and face protection – safety glasses, goggles, and face shields – crucial for preventing chemical splashes or flying debris injuries. Respiratory protection, like respirators, safeguards against airborne contaminants.
Hand protection, utilizing gloves, shields against cuts, abrasions, and chemical exposure. Foot protection, such as safety shoes, prevents impact and compression injuries. Head protection, namely helmets, protects against falling objects.
Appropriate PPE selection depends on a thorough hazard assessment, ensuring the equipment effectively mitigates identified risks within specific work environments and tasks.
Proper Use and Maintenance of PPE
Effective PPE utilization extends beyond simply wearing the equipment; proper fit is paramount for optimal protection. Training on correct donning, doffing, and adjustment is essential. Regular inspection for damage – cracks, tears, or deterioration – is crucial before each use. Damaged PPE must be replaced immediately to maintain its protective capabilities.
Cleaning and maintenance procedures vary depending on the PPE type; following manufacturer’s instructions is vital.
Proper storage, away from sunlight and extreme temperatures, prolongs PPE lifespan. Consistent adherence to these practices ensures PPE remains a reliable safety barrier.

Utilizing YouTube for Safety Education
YouTube serves as a powerful platform for delivering visual safety training, offering accessible resources to inform workers and managers about workplace hazards.
Finding Reliable Safety Training Videos
Locating trustworthy safety videos on YouTube requires careful consideration. Prioritize channels affiliated with recognized organizations like OSHA, the National Safety Council, or reputable safety training providers. Look for videos demonstrating clear, concise instruction, and up-to-date information reflecting current regulations and best practices.
Verify the video’s source and date of publication; outdated content may not align with current standards. Check for credentials of the presenter and assess the video’s production quality – professional presentations often indicate greater reliability. User comments can offer insights, but critically evaluate their validity. Supplement YouTube resources with official documentation like the “Safety First Grow and Go” manual for comprehensive understanding.
Benefits of Visual Learning in Safety
Visual learning, particularly through platforms like YouTube, significantly enhances safety training effectiveness. Demonstrations of proper procedures, hazard identification, and PPE usage are more readily grasped when shown rather than simply described. This approach caters to diverse learning styles, improving comprehension and retention;
Videos can illustrate complex scenarios and potential consequences in a compelling manner, fostering a stronger safety culture. Combining visual aids with the detailed guidance found in resources like the “Safety First Grow and Go” manual creates a powerful learning experience, ultimately reducing workplace incidents and promoting proactive safety measures.

The Cost of Workplace Accidents
Workplace accidents incurred a staggering $1.2 trillion national cost in 2022, impacting businesses and individuals; investment in safety is crucial.
National Safety Council Statistics
The National Safety Council (NSC) provides critical data illuminating the immense financial burden of workplace incidents. Their 2022 estimates reveal a nearly $1.2 trillion cost to the nation, encompassing employers and individuals directly affected by injuries and fatalities. This figure highlights not only the human tragedy but also the substantial economic repercussions.
These costs include medical expenses, lost wages, reduced productivity, and administrative expenses. Understanding these statistics is paramount for justifying safety investments and prioritizing preventative measures, ultimately aiming to reduce both human suffering and financial losses. Proactive safety programs, guided by resources like the “Safety First Grow and Go” manual, are essential for mitigating these risks.
Financial Impact of Injuries and Fatalities
Workplace accidents carry a staggering financial weight, extending far beyond immediate medical costs. The total economic burden, estimated at nearly $1.2 trillion annually by the National Safety Council, encompasses lost productivity, wage replacement, legal fees, and increased insurance premiums. Fatalities represent the most significant cost, but even non-fatal injuries contribute substantially to these figures.
Investing in comprehensive safety programs, like those detailed in the “Safety First Grow and Go” manual, demonstrates a strong business case. Reducing incidents translates directly into cost savings, improved employee morale, and enhanced operational efficiency. Prioritizing safety isn’t merely ethical; it’s financially prudent.

Specific Hazardous Substances
This section details critical information regarding dangerous compounds like Butadiene, 1,3- and Cadmium, outlining exposure risks and necessary control measures for safety.
Butadiene, 1,3-
Butadiene, 1,3- is a colorless gas widely utilized in synthetic rubber and plastic production, presenting significant health hazards. Exposure can occur through inhalation, skin contact, or eye contact, potentially leading to irritation and more severe systemic effects. Long-term exposure is linked to an increased risk of leukemia and other cancers, demanding stringent control measures.
Effective hazard control strategies include implementing engineering controls like ventilation systems, utilizing appropriate personal protective equipment (PPE) such as respirators and gloves, and establishing comprehensive monitoring programs to detect and mitigate potential exposures. Thorough worker training on the hazards of butadiene and safe handling procedures is paramount for minimizing risks and ensuring a safe working environment.
Cadmium
Cadmium, a toxic metal, poses serious health risks through inhalation, ingestion, or skin absorption, commonly found in batteries, pigments, and metal plating. Acute exposure can cause flu-like symptoms, while chronic exposure leads to kidney damage, bone weakening, and increased cancer risk. Strict adherence to safety protocols is crucial when handling cadmium-containing materials.
Implementing robust engineering controls, such as local exhaust ventilation, and providing appropriate PPE – including respirators, gloves, and protective clothing – are essential. Regular medical surveillance, including blood and urine tests, helps monitor worker exposure levels. Comprehensive training on cadmium hazards and safe work practices is vital for protecting employee health.

Worker Involvement in Safety Programs
Actively soliciting worker input through surveys and carefully reviewing safety meeting minutes are key to building a robust and effective safety culture.
Gathering Input Through Surveys
Implementing well-designed surveys is a proactive method for gathering valuable insights directly from the workforce regarding potential hazards and safety concerns. These surveys should be anonymous to encourage honest feedback, covering topics like near misses, unsafe conditions, and the effectiveness of current safety protocols.
Analyzing survey results allows for the identification of recurring issues and areas needing improvement within the safety program. The data collected provides a clear understanding of worker perceptions and experiences, enabling targeted interventions and a more responsive safety management system.
Regular survey distribution, coupled with transparent communication of findings and implemented changes, demonstrates a commitment to worker safety and fosters a culture of continuous improvement.
Reviewing Safety Meeting Minutes
Consistent review of safety meeting minutes offers a historical record of discussed hazards, implemented corrective actions, and ongoing safety concerns raised by employees. These minutes serve as a valuable resource for identifying trends and recurring issues that may require more in-depth investigation or revised safety procedures.
Analyzing meeting records helps track the effectiveness of previously implemented solutions and ensures accountability for assigned safety tasks. It also provides evidence of worker involvement in the safety program, demonstrating a proactive approach to hazard prevention.
Regular examination of these documents is crucial for maintaining a robust and responsive safety culture.

Effective Hazard Controls
Robust controls protect workers from workplace dangers, preventing injuries, illnesses, and incidents through preventative measures and a prioritized hierarchy of solutions.
Hierarchy of Controls
The hierarchy of controls is a system prioritizing hazard mitigation strategies, starting with the most effective. Elimination physically removes the hazard, while substitution replaces it with a safer alternative. Engineering controls isolate people from the hazard, like machine guarding. Administrative controls change work practices – procedures, training, and signage. Finally, Personal Protective Equipment (PPE) protects workers as a last resort.
Effective implementation requires a thorough hazard assessment and a commitment to moving down the hierarchy, aiming for inherent safety rather than relying solely on PPE. Prioritizing these controls minimizes risk and fosters a proactive safety culture.
Implementing Preventative Measures
Proactive safety relies on implementing preventative measures derived from hazard assessments and the hierarchy of controls. This includes regular inspections, preventative maintenance of equipment, and consistent enforcement of safety procedures like lockout/tagout and confined space protocols.
Crucially, these measures must be documented, communicated effectively through training, and regularly reviewed for effectiveness. Investing in safety programs demonstrably reduces workplace accidents, injuries, and associated financial burdens, creating a safer and more productive work environment for all personnel.

The Future of Workplace Safety
Technological advancements and even unexpected cultural influences like Vocaloid are shaping safety awareness, driving innovation and improved preventative strategies.
Vocaloid Culture and Safety Awareness (Indirect Relevance)
While seemingly disparate, the rise of Vocaloid, particularly Hatsune Miku, and her substantial presence on platforms like YouTube, demonstrates the power of engaging digital content. This phenomenon highlights how reaching audiences through innovative, culturally relevant mediums can foster broader awareness. Applying this principle to workplace safety suggests exploring creative, visually compelling training materials – mirroring Miku’s success – to capture attention and improve knowledge retention.
Just as Crypton Future Media’s CEO discussed Miku’s evolution, safety programs must also adapt and evolve, embracing new technologies and communication strategies to remain effective and resonate with a modern workforce.
Technological Advancements in Safety
Modern technology is revolutionizing workplace safety, moving beyond traditional training methods. Utilizing platforms like YouTube for accessible safety education, as highlighted in resources, provides visual learning opportunities. Advancements include wearable sensors monitoring worker health and fatigue, predictive analytics identifying potential hazards before incidents occur, and augmented reality for immersive training simulations.
These tools, coupled with data analysis from incident reporting, enable proactive hazard control and a shift towards preventative safety measures, ultimately reducing the financial impact of accidents and fostering a safer work environment.