prestige remote start manual
Welcome to the Prestige Remote Start Manual‚ your comprehensive guide to understanding and utilizing the advanced features of the Prestige Remote Start System. Designed for ease of use‚ this manual provides detailed instructions for installation‚ operation‚ and troubleshooting‚ ensuring optimal performance and security for your vehicle.
Overview of the Prestige Remote Start System

The Prestige Remote Start System is a cutting-edge solution designed to enhance your vehicle’s security and convenience. This advanced system allows users to start their car remotely‚ ensuring comfort in extreme weather conditions. It integrates seamlessly with vehicle security features‚ providing an additional layer of protection against unauthorized access. The system is compatible with a wide range of vehicles and offers customizable settings to suit individual preferences. With its user-friendly interface and robust functionality‚ the Prestige Remote Start System is a reliable choice for drivers seeking modern convenience and peace of mind. Professional installation is highly recommended to ensure optimal performance and safety.
Key Features and Benefits of the Prestige Remote Start

The Prestige Remote Start system offers a range of innovative features designed to enhance convenience and security. Key functionalities include remote vehicle starting‚ panic mode‚ and trunk release‚ providing added control over your car. The system also supports customizable settings‚ allowing users to tailor the experience to their preferences. With its advanced integration capabilities‚ it works seamlessly with vehicle security systems‚ ensuring comprehensive protection. The remote start function is particularly beneficial for extreme weather conditions‚ enabling you to heat or cool your car before entry. Additionally‚ the system is compatible with a wide range of vehicles‚ making it a versatile solution for drivers. These features collectively enhance the driving experience‚ offering both convenience and peace of mind.
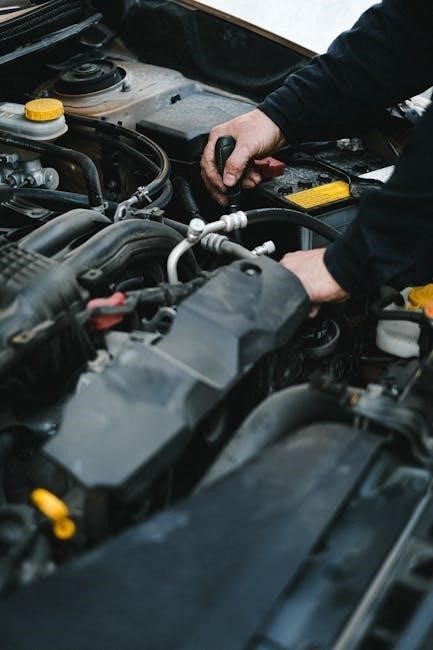
Installation of the Prestige Remote Start System
The Prestige Remote Start System requires careful preparation and technical expertise for proper installation. Professional installation is strongly recommended due to its complexity. Ensure all components are securely connected‚ and follow the provided manual for precise wiring and setup. This ensures optimal performance and reliability.
Preparation and Tools Needed for Installation

Before installing the Prestige Remote Start System‚ ensure you have the necessary tools and knowledge. A multimeter‚ wiring diagram‚ and basic hand tools are essential. Familiarity with 12-volt electronics and vehicle wiring is crucial. Review the manual thoroughly to understand system requirements. Professional installation is highly recommended due to the complexity of the setup. Gather all components‚ including the control module‚ remote controls‚ and wiring harness. Ensure the vehicle is in a well-ventilated area and in park (automatic) or neutral (manual) gear. Disconnect the battery to avoid electrical hazards; Follow proper safety protocols and consult the manual for specific instructions tailored to your vehicle. Proper preparation ensures a smooth and successful installation process.
Step-by-Step Installation Guide
Begin by disconnecting the vehicle’s battery to ensure safety. Mount the control module in an accessible location‚ typically under the dashboard. Connect the ignition‚ accessory‚ and starter wires to the corresponding vehicle circuits. Install the remote start brain and ensure all wiring is secure and routed away from moving components. Connect the hood pin and brake pedal switch for safety features. Program the remote controls by following the manual’s instructions for synchronization. Reconnect the battery and test the system to ensure proper functionality. Verify that the vehicle starts remotely and all safety features engage as intended. Consult the manual for specific wiring diagrams and detailed instructions tailored to your vehicle’s make and model. Proper installation ensures reliable performance and maintains vehicle security.

Operating the Prestige Remote Start System
Arm the system by pressing the lock button on the remote. Disarm by pressing unlock or starting the vehicle. Remote start functionality allows engine activation from a distance‚ with LED confirmation for status and operations. Ensure all doors‚ trunk‚ and hood are closed before remote starting. The system provides feedback through remote LED indicators‚ confirming successful arming‚ disarming‚ and remote start actions. Follow the manual’s instructions for customizing settings and troubleshooting common issues to ensure seamless operation.
Arming and Disarming the System
To arm the Prestige Remote Start System‚ press the lock button on your remote control. The system will confirm arming with a series of LED flashes and chirps‚ depending on your settings. Ensure all doors‚ hood‚ and trunk are closed before arming. Disarming is done by pressing the unlock button or starting the vehicle with the key. For silent disarm‚ press the unlock button once. The system also features a panic mode‚ which can be activated by holding the panic button for 2-3 seconds. LED indicators provide visual feedback for arming‚ disarming‚ and system status. Always refer to the manual for customizing arming and disarming preferences to suit your needs. Proper arming ensures vehicle security and prevents unauthorized access.
Remote Start Functionality and Customizable Settings
The Prestige Remote Start System offers advanced functionality‚ allowing you to start your vehicle with the press of a button. Key features include keyless entry‚ trunk release‚ and panic mode. Customizable settings enable you to personalize the system to your preferences‚ such as adjusting the number of clicks required for specific functions or setting silent disarm. The system also supports programmable functions like automatic start timers and temperature-based activation. To customize settings‚ use the RF feature programmer or manual adjustments as outlined in the manual. These features enhance convenience and security‚ ensuring your vehicle is ready when you are. Always refer to the manual for detailed instructions on configuring your settings for optimal performance.
Troubleshooting Common Issues
Identify common issues like remote start failures or error codes. Check wiring connections‚ battery status‚ and system settings. Consult the manual for detailed solutions and reset procedures.
Diagnosing Remote Start Failures
Diagnosing remote start failures involves checking the system’s basic components. First‚ ensure the battery in the remote control is functioning and that the signal strength is adequate. Verify that the vehicle’s parking lights or LED indicators flash during activation attempts. If the system fails to respond‚ inspect the wiring connections for any damage or loose links. Review the error codes displayed on the remote or vehicle’s dashboard‚ as they provide specific troubleshooting guidance. Consult the Prestige Remote Start Manual for detailed instructions on interpreting these codes. If issues persist‚ ensure the system is properly programmed and synced with the vehicle. Always refer to the manual for step-by-step diagnostic procedures before seeking professional assistance.
Resolving Error Codes and System Malfunctions

Resolving error codes and system malfunctions requires a systematic approach. Start by identifying the specific error code displayed on the remote or vehicle dashboard‚ as these codes indicate the source of the issue. Common errors include faulty wiring‚ weak remote signal strength‚ or incorrect programming. Consult the Prestige Remote Start Manual for a detailed list of error codes and their meanings. Once identified‚ address the issue by checking and securing all wiring connections‚ reprogramming the remote if necessary‚ and ensuring the system is properly synced with the vehicle. If the problem persists‚ reset the system by following the manual’s troubleshooting guide. For complex issues‚ professional installation or technical support may be required to restore functionality.

Advanced Features of the Prestige Remote Start
The Prestige Remote Start offers advanced programmable functions‚ customizable settings‚ and seamless integration with vehicle security systems‚ providing enhanced convenience and control for a personalized experience.
Programmable Functions and Customization Options
The Prestige Remote Start system offers a wide range of programmable functions and customization options‚ allowing users to tailor the system to their specific needs. Key features include adjustable arming delays‚ remote start duration‚ and customizable button mappings for enhanced convenience. Users can also program the system to integrate with additional accessories‚ such as trunk release or auxiliary outputs‚ for seamless operation. The system supports advanced settings like tachometer learning for manual transmission vehicles‚ ensuring smooth engine starts. Additionally‚ certain models allow for two-way communication‚ providing real-time feedback through the remote control. These customizable options ensure a personalized experience‚ making the Prestige Remote Start system adaptable to various vehicle configurations and user preferences. Proper setup and programming are essential to maximize functionality and reliability.
Integration with Vehicle Security Systems
The Prestige Remote Start system seamlessly integrates with advanced vehicle security systems‚ enhancing protection and convenience. It features alarm notifications‚ anti-theft protection‚ and passive arming for added security. The system can be programmed to trigger alerts during unauthorized access or tampering‚ ensuring your vehicle’s safety. Additionally‚ it supports integration with shock sensors‚ providing immediate feedback for any suspicious activity. The remote start function can also be linked with the vehicle’s immobilizer‚ preventing hotwiring and theft. This comprehensive integration ensures that your vehicle is not only secure but also convenient to operate. Proper configuration with your vehicle’s security features is essential for optimal functionality and peace of mind. Always refer to the manual for specific pairing instructions and compatibility details.
Thank you for choosing the Prestige Remote Start system. This manual has guided you through installation‚ operation‚ and troubleshooting. Regular maintenance ensures optimal performance and longevity. Explore advanced features and refer to this manual for further assistance.
Final Tips for Optimal Use of the Prestige Remote Start
For the best experience with your Prestige Remote Start system‚ ensure regular maintenance checks‚ such as inspecting wiring connections and updating software. Always keep the remote control batteries charged to prevent unexpected issues. Familiarize yourself with all programmable features to customize settings that suit your needs. When using the remote start‚ park your vehicle in a well-ventilated area to avoid carbon monoxide buildup. Additionally‚ avoid using the system in extreme weather conditions unless necessary. Lastly‚ consult the manual for advanced customization options and troubleshooting guides to maximize functionality and ensure long-term reliability. By following these tips‚ you can enjoy a seamless and secure remote start experience.
Importance of Regular System Maintenance
Regular maintenance of the Prestige Remote Start system is essential to ensure its reliability and performance. Inspect wiring connections periodically to avoid loose links‚ which can cause malfunctions. Update the system software whenever new versions are released to benefit from improved features and security patches. Clean the remote control and replace batteries as needed to maintain consistent functionality. Additionally‚ test the remote start feature regularly to ensure it operates smoothly; Neglecting maintenance can lead to system failures or reduced functionality‚ compromising your vehicle’s security and convenience. By prioritizing upkeep‚ you can extend the system’s lifespan and enjoy uninterrupted performance. Regular checks also help prevent potential issues before they arise‚ ensuring your Prestige Remote Start system remains efficient and dependable over time.