kucacci smart door lock manual
Welcome to the Kucacci Smart Door Lock manual, your guide to mastering this innovative security solution. Designed for easy use, it offers fingerprint recognition, keyless entry, and app integration, ensuring convenience and safety for all users, including the elderly and children. This manual provides detailed instructions for installation, troubleshooting, and unlocking the full potential of your smart lock, helping you secure your home effortlessly.
Overview of the Kucacci Smart Door Lock
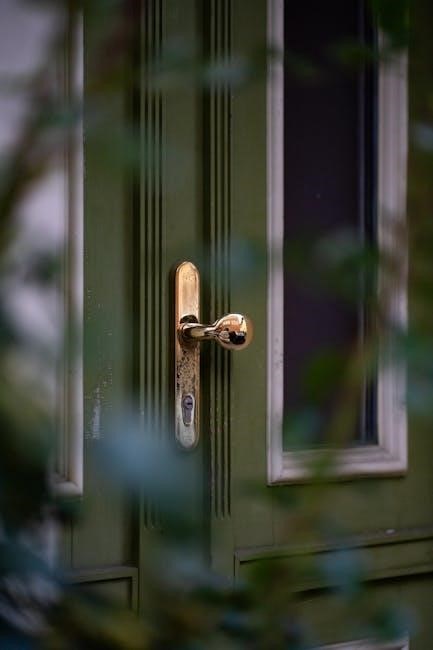
The Kucacci Smart Door Lock is a cutting-edge security solution designed for modern homes. It combines fingerprint recognition, keyless entry, and digital code features for enhanced convenience and security. With Bluetooth and Wi-Fi connectivity, it integrates seamlessly with the TTlock app, allowing remote control and monitoring. The lock features an ergonomic design, including a fingerprint sensor for quick access and a keypad for code entry. Its manual locking feature ensures added safety, especially for the elderly and children. Built with premium materials, it offers a sleek and durable solution for securing your home. This smart lock is both user-friendly and advanced, making it ideal for those seeking a reliable and futuristic security system.
Importance of the Manual for Proper Usage
The Kucacci Smart Door Lock manual is essential for ensuring smooth installation, troubleshooting, and optimal use of your smart lock. It provides detailed step-by-step guides for setting up the lock, connecting it to the TTlock app, and configuring advanced features like fingerprint recognition and keyless entry. The manual also includes safety precautions, such as installing and testing the lock with the door open to avoid being locked out. By following the manual, users can unlock the full potential of their smart lock, ensuring hassle-free operation and maximizing security. Downloading the official PDF manual guarantees access to comprehensive resources, making it indispensable for every user.

Key Features of the Kucacci Smart Door Lock
The Kucacci Smart Door Lock offers fingerprint recognition, keyless entry, a digital keypad, Bluetooth and Wi-Fi connectivity, and app integration for remote control and advanced security features.
Fingerprint Recognition Technology
The Kucacci Smart Door Lock features advanced fingerprint recognition technology, offering high accuracy and rapid authentication. With a large fingerprint database capacity, it supports multiple users for convenience. The sensor is designed for reliability, working in various environmental conditions. Fingerprint access eliminates the need for keys or codes, enhancing security and ease of use. The system ensures that only registered fingerprints can unlock the door, providing an additional layer of protection. This feature is particularly useful for households with multiple users, as it allows seamless access while maintaining privacy and security. Regular software updates ensure the technology remains up-to-date and secure.
Keyless Entry System
The Kucacci Smart Door Lock offers a convenient keyless entry system, eliminating the need for traditional keys. This feature streamlines daily use, reducing the hassle of carrying keys while enhancing security. With keyless entry, users can rely on alternative authentication methods like fingerprints, digital codes, or smartphone app control. The system is designed for seamless operation, ensuring easy access while maintaining robust security. It also minimizes the risk of key misplacement or theft, providing peace of mind. The keyless entry system integrates smoothly with other features, offering a modern and efficient solution for home access. This feature is particularly beneficial for busy households seeking convenience without compromising safety. Regular updates ensure optimal performance and reliability.
Keypad with Digital Code Entry

The Kucacci Smart Door Lock features a sleek and durable keypad for digital code entry, providing an additional layer of convenience and security. Users can enter a personalized code to unlock the door, eliminating the need for keys. The keypad is designed with a backlit interface for visibility in low-light conditions and is constructed with wear-resistant materials to ensure longevity. It supports up to 200 unique codes, allowing users to create temporary or permanent access for family, guests, or service providers. The keypad also includes anti-peep features, such as randomizing digits before entry, to enhance security. This feature integrates seamlessly with the lock’s app, enabling easy code management and updates. Regular cleaning and maintenance ensure optimal functionality. The keypad is a reliable and user-friendly option for secure access.
Bluetooth and Wi-Fi Connectivity
The Kucacci Smart Door Lock is equipped with advanced Bluetooth and Wi-Fi connectivity, enabling seamless integration with smart home systems. Bluetooth allows for quick and energy-efficient local connections, while Wi-Fi provides remote access through the TTlock app. This dual connectivity ensures users can control the lock, monitor activity, and receive notifications from anywhere. The lock supports both 2.4GHz and 5GHz Wi-Fi bands for stable and reliable connections; Bluetooth 5.0 technology offers faster pairing and a stronger signal. Together, these features enhance convenience, enabling voice commands via smart assistants like Alexa or Google Assistant. The lock’s connectivity options ensure a modern, connected, and secure home experience. Regular updates are available for optimal performance.
App Integration for Remote Control
The Kucacci Smart Door Lock integrates seamlessly with the TTlock app, offering unparalleled remote control convenience. Through the app, users can lock, unlock, and monitor their door’s status from anywhere in the world. The app provides real-time notifications for unlock attempts, successful entries, and potential security breaches. It also allows users to grant temporary or permanent access to family, guests, or service providers. The TTlock app is compatible with both iOS and Android devices, ensuring universal accessibility. Remote control via the app enhances security and convenience, making it easier to manage access without physical keys. This feature is ideal for modern lifestyles, providing peace of mind and flexibility. Regular app updates ensure improved functionality and security.
Installation and Setup Guide
The installation and setup process ensures smooth functionality. Begin with the pre-installation checklist, follow step-by-step instructions, and connect the lock to the TTlock app. Ensure proper Wi-Fi gateway setup for remote access and seamless operation.
Pre-Installation Checklist
Before installing the Kucacci Smart Door Lock, ensure you have all necessary tools and materials. Verify door thickness (35-50mm) and compatibility with the lock’s dimensions. Check power requirements: 4 AA batteries (1.5V) or a backup power source. Ensure stable Wi-Fi (2.4GHz) and Bluetooth connectivity for app integration. Download and install the TTlock app from the App Store or Google Play. Have the user manual handy for reference. Ensure no existing locks interfere with installation. Clean and prepare the door area for proper fitting. Confirm all components are included in the package. Check local regulations for smart lock compliance. Prepare a screwdriver and measuring tape for accurate installation.
Step-by-Step Installation Instructions
Begin by removing the old lock and ensuring the door is clean and dry. Align the smart lock with the door’s pre-drilled holes and secure it using the provided screws. Tighten all bolts firmly but avoid over-tightening. Install the strike plate on the door frame, ensuring proper alignment with the lock’s latch. Connect the cables to the electronic control unit and attach the keypad or fingerprint reader. Power on the lock and follow the TTlock app prompts for initial setup. Test the locking and unlocking mechanisms to ensure proper functionality. Double-check all connections and alignments before finalizing the installation. Refer to the manual for specific torque settings and safety precautions.
Connecting the Lock to the TTlock App
Open the TTlock app and select “Add Device” to begin the pairing process. Ensure Bluetooth is enabled on your smartphone. The app will search for nearby devices and display the Kucacci Smart Door Lock. Select the lock from the list to initiate pairing. Follow the in-app instructions to complete the connection. If prompted, enter your Wi-Fi password to link the lock to your network for remote access. Once connected, test the lock’s functionality through the app by locking and unlocking it. Verify that all features are accessible and functioning correctly. If issues arise, refer to the troubleshooting section or reset the lock and retry the connection process. Ensure a stable internet connection for optimal performance.
Setting Up the Wi-Fi Gateway for Remote Access
To set up the Wi-Fi gateway for remote access, first, ensure the gateway is powered on and within range of your router. Open the TTlock app and navigate to the “Add Device” section. Select “Wi-Fi Gateway” and follow the in-app instructions to connect it to your home network. Enter your Wi-Fi password when prompted. Once connected, link the gateway to your Kucacci Smart Door Lock through the app. Ensure both devices have the latest firmware for optimal performance. Test remote access by locking or unlocking the door via the app. If issues arise, check the Wi-Fi signal strength and ensure the gateway is properly paired. Regularly update the firmware to maintain functionality and security.
Using the Kucacci Smart Door Lock
Experience seamless control with the Kucacci Smart Door Lock, offering multiple access methods like fingerprint, keypad, and app-based entry for enhanced convenience and security.
Unlocking and Locking Mechanisms
The Kucacci Smart Door Lock offers robust unlocking and locking mechanisms, ensuring secure and convenient access; The motorized lock operates smoothly, with options for manual or automatic functionality. Users can lock the door with a simple touch on the keypad or through the app. The lock features a silent operation mode to minimize noise. For added security, the door automatically relocks after a set period if left unlocked. The mechanism also includes anti-theft features, such as an alarm triggered by forced entry attempts. The lock’s durability ensures long-lasting performance, providing peace of mind for home and office security needs. Regular maintenance is recommended for optimal functionality.
Manual Locking Feature
The Kucacci Smart Door Lock includes a manual locking feature for added convenience and security. Users can manually lock the door using the physical keypad or by pressing the lock button on the inside. This feature ensures that even without app connectivity, the door can be securely locked. The manual lock function is designed for simplicity, requiring just a single touch or press. It is ideal for scenarios where automation is not desired, providing a reliable backup option. The manual locking mechanism is durable and operates smoothly, ensuring consistent performance over time. Regular use of this feature helps maintain the lock’s longevity and reliability, making it a practical choice for everyday security needs.
Using the Keypad for Digital Code Entry
The Kucacci Smart Door Lock features a sleek keypad for digital code entry, offering a convenient and secure way to unlock your door. To use this feature, simply enter your pre-set digital code using the backlit keypad. The keypad is designed for ease of use, with clear buttons and a responsive interface. Once the correct code is entered, the lock will automatically unlock, indicated by a blue light. For added security, the keypad also includes a “clear” function to delete entered digits if an error occurs. This feature ensures quick access while maintaining high security standards, making it ideal for users who prefer a traditional yet modern locking mechanism.
Fingerprint Authentication Process
The Kucacci Smart Door Lock offers a seamless fingerprint authentication process for secure and convenient access. To use this feature, first ensure your fingerprint is enrolled in the system via the TTlock app. When approaching the lock, place your registered fingerprint on the sensor located on the keypad. The sensor will scan and verify your fingerprint within seconds. If the scan is successful, the lock will unlock automatically, accompanied by a green LED light and a confirmation sound. If the scan fails, a red LED light will flash. This biometric authentication ensures only authorized users can access the lock, providing an additional layer of security and eliminating the need for keys or codes. Regularly cleaning the sensor ensures optimal performance and accuracy.

Advanced Features and Customization
Customize access levels, generate temporary codes, and monitor user activity with the Kucacci Smart Door Lock, offering multi-user support and scheduling for enhanced flexibility.
Generating Temporary or Permanent Access Codes
The Kucacci Smart Door Lock allows users to create temporary or permanent access codes for guests, service providers, or family members. Temporary codes can be set for specific time periods, ensuring limited access. Permanent codes are ideal for long-term users, such as housemates or staff. Codes can be easily generated through the TTlock app, providing a secure and convenient way to manage access without sharing physical keys. This feature enhances security by allowing users to revoke codes at any time, ensuring only authorized individuals can enter. It’s a practical solution for granting access while maintaining control over your property’s security and accessibility.
Sharing Electronic Keys
The Kucacci Smart Door Lock enables users to share electronic keys seamlessly via the TTlock app. This feature allows homeowners to grant access to trusted individuals, such as family members, guests, or service providers, without the need for physical keys. Electronic keys can be shared through email, messaging apps, or QR codes, ensuring convenience and security. Users can set permissions, such as temporary or permanent access, and revoke keys at any time. This feature enhances accessibility while maintaining control over who can enter your property. It’s a modern solution for managing access efficiently, offering peace of mind and flexibility for various scenarios.
Viewing Unlocking Activity Records
The Kucacci Smart Door Lock allows users to monitor and track all unlocking activities through the TTlock app. This feature provides a detailed record of every entry, including the date, time, and method used to unlock the door (fingerprint, keypad, or app). Users can easily access this data to monitor who has entered their property and when. The activity log enhances security by offering transparency and accountability. It also helps in identifying unauthorized access attempts. By reviewing the records, homeowners can ensure their property remains secure and manage access rights effectively. Regularly checking the activity log is a proactive way to maintain your home’s safety and privacy. This feature is essential for tracking and verifying all entry events.
Authorizing Admin Access

Authorizing admin access on the Kucacci Smart Door Lock allows trusted individuals to manage and control the lock’s settings. Admin rights can be assigned through the TTlock app by adding a user’s fingerprint, keypad code, or electronic key. Admins can grant or revoke access, update settings, and monitor activity logs. To authorize admin access, open the TTlock app, navigate to the “Users” section, and select “Add Admin.” Enter the user’s details and confirm the assignment. Admin access ensures multiple layers of security and control, making it ideal for households or businesses with shared responsibility. Regularly reviewing and updating admin permissions is recommended to maintain security. This feature ensures that only trusted individuals can manage the lock’s functions and settings. It is a crucial aspect of maintaining your smart lock’s security and functionality. Always verify the identity of users before granting admin rights to prevent unauthorized control. This ensures your property remains protected and access is limited to trusted individuals only. By managing admin access effectively, you can enhance the overall security of your Kucacci Smart Door Lock. This feature is designed to provide flexibility while maintaining robust security measures. It is essential to monitor admin permissions regularly to ensure they remain up-to-date and aligned with your access needs. Authorizing admin access is a straightforward process that strengthens your lock’s security framework. Always prioritize security when assigning admin rights to maintain control over your property’s access points. This feature is a key component of the Kucacci Smart Door Lock’s advanced security system, ensuring that only authorized users can manage and control the lock’s settings. By carefully managing admin access, you can prevent unauthorized changes and maintain a secure environment. The TTlock app provides a user-friendly interface for assigning and revoking admin rights, making it easy to adjust permissions as needed. Regular audits of admin access are recommended to ensure that only current and trusted individuals have control. This feature is designed to provide peace of mind while maintaining the highest level of security for your smart door lock. Authorizing admin access is a critical step in maximizing the functionality and security of your Kucacci Smart Door Lock. Always follow the app’s guidelines to ensure a smooth and secure process. This ensures that your property remains protected and that only trusted individuals have administrative control. By leveraging the admin access feature, you can enjoy enhanced security and convenience with your Kucacci Smart Door Lock. It is a powerful tool for managing access rights and maintaining the integrity of your smart lock system. Always remember to update admin permissions whenever there are changes in trusted users to keep your security robust. This feature is a testament to the Kucacci Smart Door Lock’s commitment to providing advanced security solutions for modern homes and businesses. By authorizing admin access carefully, you can ensure that your property’s security is in the right hands. This feature is an essential part of the lock’s functionality, offering both convenience and security. Always prioritize security when managing admin access to protect your property effectively. The Kucacci Smart Door Lock’s admin access feature is designed to provide a balance between flexibility and security, ensuring that your property remains safe and access is controlled. By following the guidelines and regularly updating admin permissions, you can enjoy the full benefits of this advanced feature. Authorizing admin access is a simple yet critical step in maintaining the security and functionality of your Kucacci Smart Door Lock. Always ensure that only trusted individuals have admin rights to protect your property. This feature is a key part of the lock’s security framework, offering peace of mind and advanced control. By managing admin access effectively, you can maximize the potential of your Kucacci Smart Door Lock while keeping your property secure. Always review and update admin permissions as needed to maintain optimal security. This ensures that your smart door lock continues to provide reliable and secure access control for your home or business. Authorizing admin access is a straightforward process that enhances the overall security and functionality of your Kucacci Smart Door Lock. Always follow the app’s instructions to ensure a secure and efficient experience. This feature is a valuable tool for managing access rights and maintaining the integrity of your smart lock system. By carefully managing admin access, you can enjoy the benefits of your Kucacci Smart Door Lock with confidence. Always prioritize security when assigning admin rights to protect your property and ensure that only trusted individuals have control. This feature is designed to provide a seamless and secure experience, making it an essential part of your smart lock’s functionality. By authorizing admin access responsibly, you can maintain the highest level of security for your Kucacci Smart Door Lock. Always remember to update permissions as needed to reflect changes in trusted users. This ensures that your property remains protected and that your smart lock continues to function optimally. Authorizing admin access is a critical aspect of managing your Kucacci Smart Door Lock’s security and functionality. Always follow the guidelines provided in the TTlock app to ensure a smooth and secure process. This feature is a powerful tool for controlling access rights and maintaining the security of your property. By managing admin access effectively, you can enjoy the full benefits of your Kucacci Smart Door Lock while keeping your home or business secure. Always review and update admin permissions regularly to ensure that only trusted individuals have control. This feature is designed to provide a balance between convenience and security, making it an essential part of your smart lock system. By authorizing admin access carefully, you can protect your property and maintain the integrity of your Kucacci Smart Door Lock’s security features. Always prioritize security when managing admin rights to ensure that your property remains safe and access is controlled. This feature is a key component of the lock’s advanced security framework, offering peace of mind and enhanced control. By managing admin access effectively, you can maximize the functionality and security of your Kucacci Smart Door Lock. Always follow the app’s instructions to ensure a secure and efficient experience. This feature is a valuable tool for managing access rights and maintaining the security of your smart lock system. By carefully managing admin access, you can enjoy the benefits of your Kucacci Smart Door Lock with confidence. Always prioritize security when assigning admin rights to protect your property and ensure that only trusted individuals have control. This feature is designed to provide a seamless and secure experience, making it an essential part of your smart lock’s functionality. By authorizing admin access responsibly, you can maintain the highest level of security for your Kucacci Smart Door Lock. Always remember to update permissions as needed to reflect changes in trusted users. This ensures that your property remains protected and that your smart lock continues to function optimally. Authorizing admin access is a critical aspect of managing your Kucacci Smart Door Lock’s security and functionality. Always follow the guidelines provided in the TTlock app to ensure a smooth and secure process. This feature is a powerful tool for controlling access rights and maintaining the security of your property. By managing admin access effectively, you can enjoy the full benefits of your Kucacci Smart Door Lock while keeping your home or business secure. Always review and update admin permissions regularly to ensure that only trusted individuals have control. This feature is designed to provide a balance between convenience and security, making it an essential part of your smart lock system. By authorizing admin access carefully, you can protect your property and maintain the integrity of your Kucacci Smart Door Lock’s security features. Always prioritize security when managing admin rights to ensure that your property remains safe and access
Troubleshooting Common Issues
Troubleshooting common issues with your Kucacci Smart Door Lock involves checking connectivity, ensuring proper battery levels, cleaning the fingerprint sensor, and restarting the TTlock app for optimal performance.
Resolving Connectivity Problems
Connectivity issues with the Kucacci Smart Door Lock can often be resolved by restarting the Wi-Fi gateway and ensuring the lock is within range. Check the TTlock app for firmware updates and verify that Bluetooth and Wi-Fi settings are enabled. If the lock fails to connect, reset it by pressing and holding the reset button for 10 seconds; Ensure the device’s battery level is above 20%, as low power can disrupt connectivity. Additionally, check for physical obstructions between the lock and the gateway. If problems persist, uninstall and reinstall the TTlock app or consult the Wi-Fi network settings for stability. Regular checks ensure uninterrupted smart functionality.
Fingerprint Recognition Issues
If the fingerprint sensor isn’t recognizing prints, ensure the sensor is clean and free from dirt or moisture. Use a soft cloth to wipe it gently. Check that fingers are dry and not worn, as this can affect recognition. Re-enroll fingerprints in the TTlock app by deleting old records and scanning again. Avoid pressing too hard or moving fingers during the scan. If issues persist, restart the lock and retry. Verify that the lock is updated with the latest firmware. Physical conditions like cuts or worn fingerprints may require multiple scans for accurate registration. Ensure proper hand positioning and alignment with the sensor for reliable performance. Regular cleaning and updates improve accuracy over time.
Keypad Malfunction Solutions
If the keypad is unresponsive or malfunctioning, start by cleaning it with a soft cloth to remove dirt or debris. Ensure the battery has adequate power, as low battery can cause keypad issues. Check for correct code entry, as repeated incorrect attempts may trigger a temporary lockout. Verify that the keypad backlight is functioning for better visibility in low light. If the problem persists, reset the lock by removing and reinstalling the batteries. Ensure the keypad is properly aligned and securely attached. Update the lock’s software via the TTlock app to resolve any firmware-related issues. If malfunction continues, contact customer support for further assistance or potential replacement. Regular maintenance ensures optimal performance.
Battery Life and Replacement Tips
The Kucacci Smart Door Lock operates on rechargeable batteries, typically lasting 6-12 months depending on usage. To maximize battery life, avoid extreme temperatures and ensure proper installation. Monitor battery levels via the TTlock app, which provides alerts when levels are low. Replace batteries promptly to prevent system shutdown. Use high-quality, compatible batteries to maintain performance. Avoid mixing old and new batteries. When replacing, disconnect the old ones first and install the new set correctly. Store spare batteries in a cool, dry place. Regularly check battery health and update the app for optimal energy management. Proper care ensures reliable operation and extends battery longevity.
Maintenance and Care
Regular maintenance ensures optimal performance. Clean the fingerprint sensor and keypad with soft cloths. Update software periodically for enhanced security and functionality. Replace worn parts promptly.
Cleaning the Fingerprint Sensor
To ensure accurate fingerprint recognition, clean the sensor regularly. Use a soft, dry cloth to wipe away dirt or oils. For stubborn smudges, lightly dampen the cloth with water, but avoid harsh chemicals or excessive moisture. Gently rub the sensor in one direction to prevent scratching. Allow it to air dry before use. Avoid touching the sensor with bare hands afterward. Cleaning every 1-2 weeks maintains performance. Never spray liquids directly on the sensor or use abrasive materials, as this may damage the sensitive surface. Regular maintenance ensures reliable fingerprint authentication and extends the lock’s lifespan. Always power off the lock before cleaning for safety.
Maintaining the Keypad Durability
To maintain the keypad’s durability, clean it regularly with a soft, dry cloth. Avoid using harsh chemicals or abrasive cleaners, as they may damage the surface. For stubborn dirt, lightly dampen the cloth with water, but ensure it is not soaking wet. Gently wipe the keypad in a circular motion to remove grime. Avoid exposing the keypad to direct sunlight or moisture, as this can cause wear. If liquids spill on the keypad, clean them immediately to prevent damage. Regular maintenance ensures the keypad remains responsive and functional. Replace the keypad only with authorized Kucacci parts if damage occurs. Proper care extends the lifespan of the keypad and ensures reliable operation. Always follow the manufacturer’s guidelines for cleaning and maintenance.
Regular Software Updates
Regular software updates are essential to ensure your Kucacci Smart Door Lock operates at peak performance. Updates often include security patches, feature enhancements, and bug fixes. To update the software, open the TTlock app and navigate to the “Settings” menu. Select “Device Update” and follow the on-screen instructions. Ensure the lock is connected to a stable Wi-Fi network during the process. Do not interrupt the update, as this could cause system instability; After completion, restart the lock to apply the changes. Regular updates protect your device from vulnerabilities and improve functionality. Always check for updates periodically to maintain optimal performance and security.

Security and Safety Features
The Kucacci Smart Door Lock offers advanced security features, including anti-theft mechanisms, tamper alerts, and secure biometric authentication, ensuring robust protection for your home.