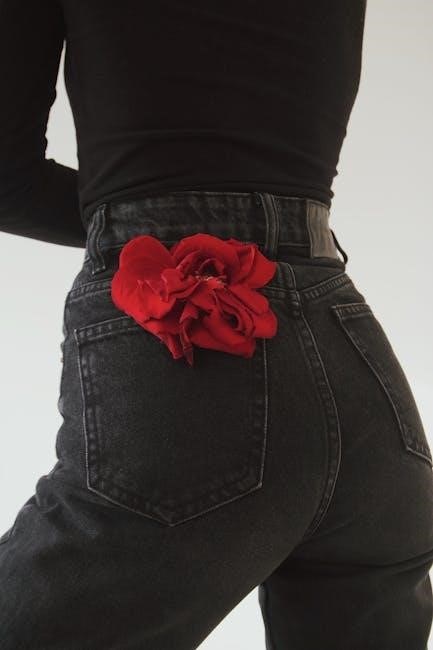
A welt pocket is a sleek, slit-style pocket finished with a fabric band, commonly used in tailored garments like jackets and trousers. Its clean design enhances both functionality and aesthetics, making it a popular choice for sewists aiming to add a professional touch to their creations.
1.1 What is a Welt Pocket?
A welt pocket is a type of slit pocket finished with a fabric band, or welt, that covers the opening. It is commonly used in tailored garments like jackets, trousers, and skirts. The welt pocket consists of a rectangular opening in the fabric, reinforced with a separate strip of fabric, creating a clean, professional appearance; Unlike other pockets, the welt pocket is designed to be inconspicuous, blending seamlessly into the garment while providing functional storage. Its construction involves sewing the welt to the garment and attaching a pocket bag underneath, making it both durable and elegant. This technique is popular for its timeless appeal and versatility in various sewing projects.
1.2 Importance of Welt Pockets in Garment Sewing
Welt pockets are a cornerstone of professional garment sewing, offering a sleek, polished finish that enhances both functionality and aesthetics. Unlike bulkier pocket styles, welt pockets lie flat against the fabric, making them ideal for tailored garments like jackets, trousers, and skirts. Their streamlined design ensures minimal visible stitching, creating a clean, sophisticated look. Additionally, welt pockets are durable and long-lasting, withstanding frequent use without fraying or weakening. For sewists, mastering the welt pocket technique is essential for achieving professional results and adding value to handmade garments. It’s a skill that elevates projects, making them look store-bought while providing practical storage solutions.

Tools and Materials Needed for Sewing a Welt Pocket
Essential tools include a sewing machine, sharp scissors, pins, and a seam ripper. Materials required are fabric for the welt and pocket bag, stabilizer for support, and matching thread.
2.1 Essential Sewing Tools
To sew a welt pocket, you’ll need a few key tools; A sewing machine is essential for precise stitching, while sharp scissors or rotary cutters ensure clean fabric cuts. Pins will help align the welt and pocket bag accurately. A seam ripper is handy for correcting mistakes. Additionally, a ruler or measuring tape is necessary for marking straight lines, and an iron is crucial for pressing seams flat. Some sewists also use stabilizer or interfacing to add structure to the welt. These tools collectively ensure a professional finish and make the sewing process more efficient and accurate.
2.2 Fabric Requirements for the Welt and Pocket Bag
Choosing the right fabric is crucial for a professional-looking welt pocket. The welt itself should be made from a sturdy fabric, such as cotton or wool, to provide structure and stability. The pocket bag, hidden inside the garment, can be crafted from lighter-weight fabrics like cotton lawn or lining material. For a cohesive appearance, the welt fabric should match or complement the main garment fabric. If desired, contrasting fabric can be used for a decorative touch. Ensure fabrics are pre-washed to prevent shrinkage and pressed before cutting to achieve crisp, clean results. Proper fabric selection ensures durability and a polished finish for the welt pocket.

Step-by-Step Guide to Sewing a Welt Pocket
Sewing a welt pocket involves cutting the welt and pocket bag, attaching the welt to the garment, and sewing the pocket bag for a professional finish using precise techniques and quality materials.
3.1 Cutting the Welt and Pocket Bag
Cutting the welt and pocket bag accurately is crucial for a professional-looking welt pocket. Measure and cut the welt fabric to the desired length and width, ensuring it matches your garment’s pocket opening. For the pocket bag, cut a slightly larger piece to allow for seam allowances. Use a ruler or pattern to achieve straight, precise cuts. Ensure the fabric is aligned properly, and consider using a rotary cutter for accuracy. If using a pattern, trace and cut carefully. Remember, the welt should be slightly shorter than the pocket opening for a neat finish. Press the cuts to maintain shape before sewing.
3.2 Attaching the Welt to the Garment
Attach the welt to the garment by aligning its edges with the pocket opening. Pin the welt in place, ensuring it is centered and evenly spaced. Sew along the length of the welt using a straight stitch, starting and stopping at the ends of the pocket opening. Fold the seam allowances under and press to create a crisp fold. This step securely anchors the welt to the garment, forming the foundation of the pocket. Use a matching thread color to blend with the fabric for a professional finish. Ensure the welt lies flat and even before proceeding to sew the pocket bag.
3.3 Sewing the Pocket Bag
Once the welt is attached, place the pocket bag under the welt, aligning raw edges. Pin the pocket bag in place, ensuring it is centered and evenly spaced. Sew along the sides and bottom of the pocket bag using a straight stitch, leaving a small opening for turning. Carefully trim excess fabric from the seams, then turn the pocket bag right side out. Press the seams to create a crisp edge. Fold the opening under and press, then topstitch along the pocket edges for a professional finish. Ensure the pocket bag is securely attached and lies flat beneath the welt for a polished look.

Advanced Techniques for Welt Pockets
Explore advanced methods like double welt pockets and decorative flaps or zippers to enhance functionality and style, offering a professional finish to your tailored garments.
4.1 Sewing a Double Welt Pocket
A double welt pocket adds elegance and functionality, featuring two welt strips. Begin by cutting two welt pieces and two pocket bags. Place the first welt on the garment, aligning edges. Sew in place, then attach the second welt symmetrically. Fold and press both welts inward, creating a channel. Sew the pocket bags to each welt, ensuring they align perfectly. Turn the bags right side out and sew the sides together. Attach the completed pocket to the garment, ensuring even stitching. This technique offers a sophisticated look, ideal for high-end tailoring projects and professional finishes;
4.2 Adding Decorative Flaps or Zippers
Enhance functionality and aesthetics by adding decorative flaps or zippers to your welt pockets. For flaps, cut a small fabric piece, add interfacing for stability, and sew it to the garment above the pocket opening. Topstitch for a polished look. For zippers, shorten one to fit the pocket slit, place it under the welt, and sew carefully to secure. Ensure the zipper aligns with the welt edges for a seamless appearance. These decorative elements add a professional touch and personal style to your welt pockets, making them stand out in tailored garments like jackets or trousers.

Common Mistakes and Troubleshooting
Common errors include misaligned welt edges and uneven stitches. To fix, ensure accurate cutting, use a seam guide, and press thoroughly. Precision and patience yield professional results.
5.1 Avoiding Uneven Stitches
Uneven stitches can ruin the professional look of a welt pocket. To prevent this, maintain consistent tension while sewing, use a walking foot if available, and backstitch at the beginning and end of seams. Pressing the welt before sewing ensures crisp folds, leading to straighter stitches. Additionally, marking the fabric accurately with chalk or a ruler helps guide the needle, reducing the likelihood of deviations. Regularly checking your stitch length and alignment as you sew can also help catch and correct issues early, ensuring a polished finish for your welt pocket.
5.2 Fixing Misaligned Welt Edges
Misaligned welt edges can disrupt the pocket’s professionalism. Start by carefully identifying where the edges are uneven. Gently pull the fabric taut and realign the welt, ensuring the edges are flush. Pin or clip the corrected position securely. If necessary, press the area to flatten any wrinkles. Sew slowly, maintaining steady tension to avoid further misalignment. Regularly inspect your work as you go to catch and correct any issues early. This attention to detail will ensure a smooth, professional finish for your welt pocket.
Mastering welt pockets enhances your sewing skills and elevates garment professionalism. Practice consistently, and don’t hesitate to experiment with advanced techniques for stunning, polished results every time.
6.1 Best Practices for Professional Results
To achieve professional results when sewing welt pockets, focus on precision and attention to detail. Use sharp tools and high-quality fabric to ensure clean cuts and smooth stitching. Always press seams as you go to maintain a crisp finish. Align welt edges carefully to avoid misplacement, and use a walking foot or Teflon foot for even feeding. Double-check measurements before cutting to prevent errors. For a polished look, topstitch the welt and pocket opening. Practice on scrap fabric to refine techniques, and consider hand-basting for intricate alignment. By combining patience with these practices, you’ll create welt pockets that look professionally tailored and enduringly durable.
6.2 Encouragement for Beginners
Mastering welt pockets may seem daunting at first, but with patience and practice, anyone can achieve professional results. Start with simple projects to build confidence, and don’t hesitate to use online tutorials for guidance. Remember, even experienced sewists began with their first welt pocket. Embrace mistakes as learning opportunities and celebrate small victories along the way. Each attempt brings you closer to perfection. Stay motivated, and soon you’ll be creating sleek, functional pockets with ease. Sewing is a skill that grows with time, so enjoy the journey and take pride in your creations!
